Vanilla Celebration Cake

Thursday, June 16, 2011
So can you guess where I'm headed this Fall? PITT.

I made this cake immediately after we returned home from visiting the PITT admissions office. It was such a thrilling and exiting day! We talked to an admissions counselor and I got to learn a lot about the school. And that night, I put in my enrollment deposit. Did you know the deadline to basically pick what college you're going to is May 1st? Yeah, well this decision was made round-abouts April 21nd? Yeah, cutting it pretty close.... But ultimately I feel like PITT is the best choice for me!

My ephiphany came one afternoon (April 16th?) while I was driving around Oakland in dowtown Pittsburgh (where PITT's campus is) with my friend Vinnie. As we were driving I would point out places and streets and name things for him. I'd show him some places I love going to or wish I could go to. Eventually he stopped me and said, "Sherry. Why aren't you going to PITT?" I have an obvious love for Pittsburgh. I can't explain it. The culture, the theater, the arts, the food, the people. It's home. It's not that I'm afraid to leave and be on my own, it's that I'm already where I need to be. Trust me, I'm more than ready to be on my own!
I love the atmosphere of downtown Pittsburgh and I can't wait to be immersed in it everyday=) Sure my parents only live 15 minutes away, but being in town is a completely different world. And, staying close to home will allow me to keep in touch with my cousins, aunts and uncles, and sister, who are all major parts of my life.
Now you may be wondering what I plan to study while I attend PITT. Well, I'll save that for another post;) Now let's talk about cake!

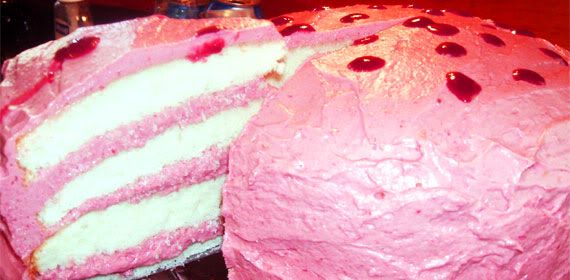
I don't often make celebration cakes. They are big and my family is small. And this cake was BIG. And I probably ate half of it. No lie. It was SOOO good. As you may have noticed, the layers are HUGE. Yeah, that was a surprise to me as well. I put the batter in 2 9-inch round pans, and seriously these things puffed up like crazyyyyy. Now, they may look a little brown on top, but the inside is perfect! I was worried when I saw the tops, but one bite immediately set aside my fears. That said, a longer baking time was needed. The frosting recipe I choice was my go-to vanilla frosting recipe from Martha Stewart. Absolutely perfect. In fact, the frosting just barely covered the sides of the cake and I was worried with how thick the cake was if the frosting would be balanced enough. And guess what? It was perfect!

The cake is a tight crumb and oh so moist. It's going to be my go-to vanilla cake recipe from now on. It is incredibly easy to work with and yeilds amazing results! Use this recipe if your making a vanilla cake for a celebration because you'll certainly please everyone!
Vanilla Cake
Yield: Two 9-inch round, 2-inch tall cake layers, and, in theory, 22 to 24 cupcakes, two 8-inch squares or a 9×13 single-layer cake
4 cups plus 2 tablespoons cake flour (not self-rising)
2 teaspoons  baking powder
1 1/2 teaspoons baking soda
1 teaspoon table salt
2 sticks unsalted butter, softened
2 cups sugar
2 teaspoons pure vanilla extract
4 large eggs, at room temperature
2 cups buttermilk, well-shaken
Preheat oven to 350°F. Butter two 9-inch round cake pans and line with circles of parchment paper, then butter parchment. (Alternately, you can use a cooking spray, either with just butter or butter and flour to speed this process up.)
Sift together flour, baking powder, baking soda, and salt in a medium bowl. In a large mixing bowl, beat butter and sugar in a large bowl with an electric mixer at medium speed until pale and fluffy, then beat in vanilla. Add eggs 1 at a time, beating well and scraping down the bowl after each addition. At low speed, beat in buttermilk until just combined (mixture will look curdled). Add flour mixture in three batches, mixing until each addition is just Incorporated.
Spread batter evenly in cake pan, then rap pan on counter several times to eliminate air bubbles. (I like to drop mine a few times from two inches up, making a great big noisy fuss.) Bake until golden and a wooden pick inserted in center of cake comes out clean, 35 to 40 minutes. Cool in pan on a rack 10 minutes, then run a knife around edge of pan. Invert onto rack and discard parchment, then cool completely, about 1 hour.
 

Fluffy Vanilla Frosting1 1/2 cups (3 sticks) unsalted butter, room temperature
1 pound (4 cups) confectioners' sugar, sifted
1/2 teaspoon pure vanilla extract

Directions
1) With an electric mixer, beat butter on medium-high speed until pale and creamy, about 2 minutes.

2 )Reduce speed to medium. Add the confectioners' sugar, 1/2 cup at a time, beating well after each addition and scraping down sides of bowl as needed; after every two additions, raise speed to high and beat 10 seconds to aerate frosting, then return to medium-high. This process should take about 5 minutes. Frosting will be very pale and fluffy.

3) Add vanilla, and beat until frosting is smooth. If not using immediately, frosting can be refrigerated up to 10 days in an airtight container. Before using, bring to room temperature, and beat on low speed until smooth again, about 5 minutes.

Chocolate Chip Cheesecake Brownies

Friday, June 10, 2011

You remember my last post? Yeah, well these are the Raspberry Swirl Cheesecake Brownie's uglier cousin: Chocolate Chip Cheesecake Brownies. They are as ugly as they are delicious. So pretty delicious=)
These pictures embarass me. They really do. I know a lot of people refuse to put subpar photos on their blog, but obviously I have low standards. Love me anyways? But honestly, I wouldn't have had any pictures to share with you. And who likes a food post with no pictures in it? Exactly: no one.


As I said with the other brownies, I brought these to a bakesale and they were gobbled up in just a few minutes! It was crazyyy. Also, like the last brownies, these were soooooo under baked (I didn't bring the really bad ones to the sale. Those were put in a much better place... my mouth). So definitely watch for doneness when you pull these out.


Chocolate Chip Cheesecake Brownies
Smitten Kitchen
Makes 16 2-inch square, thick brownies
Brownie batter
 1 stick (1/2 cup or 4 ounces) unsalted butter, cut into pieces
 3 ounces unsweetened chocolate, chopped
 1 cup sugar
 2 large eggs
 1/2 teaspoon pure vanilla extract
 2/3 cup all-purpose flour

Cheesecake batter
8 ounces cream cheese, well softened
 1/3 cup sugar
 1 large egg yolk
 1/4 teaspoon pure vanilla extract

Plus
 1/2 cup semisweet chocolate chips (I used minis and it worked fine!)

Make brownie batter: Put oven rack in middle position and preheat oven to 350°F. Butter an 8-inch square baking pan. Microwave chocolate and butter together in a safe dish and mix until they combine. Whisk in sugar, eggs, vanilla, and a pinch of salt until well combined. Whisk in flour until just combined and spread in baking pan.

Make cheesecake batter: Whisk together cheesecake batter ingredients in a small bowl until smooth. Add in chocolate schips. Dollop over brownie batter, then swirl in with a knife or spatula.

Bake brownies: Bake until edges are slightly puffed and center is just set, about 35 minutes. Serve warm or at room temperature.

Slicing tip: Chill the brownies until they’re almost frozen before cutting them. It makes it much easierto get a clean slice.

Raspberry Swirl Cheesecake Brownies

Wednesday, June 8, 2011

Wow. Where have I been? Busy=/ And I just haven't been too inspired to blog. It's probably because of these subpar photos. Usually if I take pretty decent photos I'm more willing to blog. And why not? If I have great pictures I'm much more willing to show it off in a blog post. But taking pictures of my food often frustrates me=( I don't enjoy wasting time setting up a perfect light reflective area to take optimum pictures while my food grows cold.

And these pictures are pretty bad. These bars aren't very well cut and have poor backgrounds. The photos were taken late at night so the lighting is messed up. But I just hope they don't scare you too badly.


Because they are delicious! If you've been reading my blog, you'll know I'm not a big fan of chocolate desserts. Just look through my post history. But, when chocolate is balanced with another flavor, it gets a thumnbs-up. So we have a brownie base then a cheesecake layer SWIRLED WITH RASPBERRY JAM. I brought these in for a bake sale, and they sold in literally 5 minutes. So, even though they don't look so hot in these photos, they were certainly enjoyed by all!


*My only comment: they were super gooey in the middle. Normally I'm all for underbaked goodies, but I would suggest triple checking for doneness when baking these.

Raspberry Cheesecake Brownies
from Baking Bites

 1/2 cup butter, room temperature
 2-oz dark chocolate, chopped
 1 cup sugar
 2 large eggs
 1 tsp vanilla extract
 2/3 cup flour
 2 tbsp cocoa powder
 1/4 tsp salt

 8-oz cream cheese, room temperature
 1/3 cup sugar
 1 large egg
 1/2 tsp vanilla extract
 1/3 cup raspberry preserves/jam
Preheat oven to 350F. Line an 8×8-inch square baking pan with aluminum foil and lightly grease.
 In a small, heatproof bowl, melt butter and chocolate together. Stir with a fork until very smooth. Set aside to cool for a few minutes.

 In a large bowl, whisk together sugar, eggs and vanilla extract. Whisking steadily, pour chocolate mixture into sugar mixture. Stir until smooth. Sift flour, cocoa powder and salt into the bowl and stir until just combined.
 Pour into prepared pan and prepare cheesecake mixture.
 In a medium bowl, beat cream cheese, sugar, egg and vanilla extract until smooth. Drop in dollops onto prepared brownie batter. Drop dollops of raspberry preserves into the cheesecake batter. Gently swirl batters with a butter knife, giving the brownies a swirly look.

 Bake for 35-40 minutes, until brownies and cheesecake are set. A knife inserted into the cheesecake mixture should come out clean and the edges will be lightly browned.
 Cool in the pan completely before slicing and serving, either at room temperature or chilled.
 Brownies can be refrigerated, covered, for several days.

Makes 16 brownies

Cinnamon Chocolate Chip Sour Cream/Cottage Cheese Coffeecake

Monday, May 16, 2011

Yes it is necessary to put sour cream/cottage cheese in the lengthy title because that is the whole reason I made this! I had a bunch of fun baking substitutes in my fridge that I wanted to use up before the went bad. Things like buttermilk, sour cream, and cottage cheese. How fun would it be to substitute theese in a recipe and see how it turns out?

I would love to start tweaking recipes and even creating my own. As a young blogger, I have always followed recipes to a tee and hardly ever stray from the beaten path. But as I'm growing in my skills I want to start getting creative! This was a small small start, but hey it's something!

It was a great texture, and it didn't even contain the signature streusel that coffee cakes usually do. I loved the chocolate chips throughout; they definitely made this cake. Of course I can never leave well enough alone, so I made myself a cinnamon confectioners sugar glaze, but you honestly don't even need it.

Nom Nom!

Cinnamon Chocolate Chip Sour Cream/Cottage Cheese Coffeecake
inspired by The Food Librarian

Cake
1/2 cup unsalted butter at room temperature
1 1/2 cups granulated sugar
3 large eggs, separated
1 1/2 teaspoons vanilla extract
1 cup sour cream
1 cup cottage cheese
3 cups all-purpose flour
1 teaspoon baking powder
1 1/2 teaspoons baking soda
3/4 teaspoon table salt

Filling and Topping
2 cups or 12 ounces semi- or bittersweet chocolate chips
1/2 cup granulated sugar
1 teaspoon cinnamon
Preheat oven to 350°F. Butter a 9-x-13-inch baking pan. If not nonstick coated, cover the bottom with a rectangle of parchment paper. Set pan aside.
In a large bowl, cream butter and 1 1/2 cups sugar. Beat in egg yolks and vanilla. Sift flour, baking soda, baking powder and salt together into a separate bowl. Alternately mix in sour cream and cottage cheese and then dry ingredients into butter mixture until both are used up and the batter is smooth and very thick. In a medium bowl, beat eggs whites until stiff, then fold into batter.
In a small dish, whisk together sugar and cinnamon for filling and topping.
Spread half the cake batter in the bottom of prepared pan. Sprinkle with half of cinnamon-sugar mixture and 1 cup of chocolate chips. Dollop remaining cake batter over filling in spoonfuls. Use a rubber or offset spatula to gently spread it over the filling and smooth the top. Sprinkle batter with remaining cinnamon-sugar and remaining chocolate chips. With the palm of your hand, ever-so-gently press the chocolate chips a bit into the batter. No need to submerge them, you just want to make sure they adhere bit.
Bake for 40 to 50 minutes, rotating halfway through, until a tester inserted into the center of the cake comes out clean.

Baked Spaghetti Dinner

Sunday, May 8, 2011

With school winding down, I haven't been blogging a lot. I read plenty of blogs, but mine seems to get pushed aside. Whoops! I'm caught up with end of the year stuff, and preparing for college next year. Which, I will tell you guys more about later in a special post=)


This dish was easy, though I didn't think some of the instructions were that clear. The good thing is that it is so flexible. So do it how you want=) I didn't use real pesto leaves, but like a squeeze tube bottle my mom bought. I was still very good with this substitution.

I liked eating spaghetti like this. The sauce and meat are distributed nice and it was quite tasty. It was a hit in my family=)

Interesting tidbit, I took these photos with my phone. I think they turned out pretty well. Then again, most of my pictures are pretty mediocre so it doesn't really make that big of a different haha.

Baked Spaghetti Dinner
found at How Sweet It Is

serves 4-6
3/4 pound whole wheat spaghetti
1/2 onion, chopped
3 cloves garlic, minced
1 tablespoon olive oil
1 1/4 pounds ground beef
1 teaspoon salt
1 teaspoon pepper
10-12 fresh basil leaves, chopped
2 cups of your favorite pasta sauce
1 cup shredded mozzarella cheese
1/2 cup freshly grated parmesan cheese


Preheat oven to 350 degrees. Prep water to boil for pasta. I cooked a spaghetti with a 10-minute cooking time for 7 minutes since it was going in the oven.

Heat a skillet on medium heat and add olive oil. Add onions with a sprinkle of salt and pepper and saute until soft, about 5-6 minutes. Add garlic and stir for another minute. Season ground beef with the teaspoon of salt and pepper and add to skillet. Break apart with a wooden spoon and brown on both sides. This should only take about 5-6 minutes.

Stir in one cup of pasta sauce and half of the chopped fresh basil. Mix to combine. Spray a 9×13 baking dish (or baking dish of your choice, I used an 8-inch round, 4-inch deep dish) with non-stick spray. Add half of the spaghetti mixture to the dish, then top with 1/2 cup tomato sauce and half of each cheese. Add the remaining spaghetti and top with the rest of the sauce and cheese. Bake for 20 minutes, or until cheese is golden brown and bubbly.

Apple Cinnamon Baked Granola

Tuesday, May 3, 2011
I just love eating granola with my yogurt in the morning. Straight yogurt just doesn't feel right to me. I love having contrasting textures in my foods, and granola fits the bill perfectly! For my first attempt at making granola, I went to a health food blog I certainly trust to steer me in the right direction! Healthy Food For Living.


I only made three slight changes. Instead of cashews, I used walnuts. Instead of puffed brown rice cereal, I used chex mix. And instead of dried apple pieces, I use real apple chunks! Note: Good idea if you plan on eating this over the first few days. Two weeks later, you will find mold...


Apple Cinnamon Baked Granola
found at Healthy Food For Living

Ingredients:
1 1/2 cups rolled oats
1 1/2 cups puffed brown rice cereal (I used Chex Mix)
6 Tbsp unsweetened applesauce
1/4 cup pure maple syrup
1/2 tsp pure vanilla extract
1 Tbsp ground cinnamon 
1/4 tsp salt
1/2 cup chopped nuts, such as walnuts, pecans, or almonds (I used walnuts)
1 cup chopped dried apple rings (Use real apple chunks with caution as I mentioned before)

Directions:
Preheat oven to 325 degrees F. Line a cookie sheet with parchment paper.
Measure the oats and rice cereal into a large bowl, set aside.
In a medium bowl, whisk together the applesauce, maple syrup, vanilla extract, cinnamon, and salt. Whisk until very smooth.
Pour wet ingredients over cereal and stir until evenly coated. Spread mixture on the prepared cookie sheet in an even layer.
Bake for 15 minutes. Remove sheet from the oven, stir the nuts into the granola, and bake for an additional 10-15 minutes, or until the granola is golden brown and crisp.
Remove granola from the oven, toss with the dried apples, and cool completely. Store in an airtight container.

Pizza on Ciabatta

Thursday, April 28, 2011
I loved everything about this recipe when  I saw it. I stole this from How Sweet It Is, like a lot of the recipes I have tried. But it's the highest form of flattery I believe=)


This pizza was soo good and really easy. I love how flexible the recipe is. You can honestly do anything with it. It's nice that you can skip the dough step of pizza making. And it's definitely a step up from frozen pizza.


I can't wait to try this again, but I'm definitely going to expand on it. New flavors and maybe try a spin on buffalo chicken dip?? I have a major obsession with buffalo chicken dip and I really don't show it enough on this blog.


Pizza on Ciabatta
Idea from How Sweet It Is

Your choice of baguette type bread (I used ciabatta)
Pizza sauce
Shredded cheese
Toppings of your choice

Method: Preheat oven to 350. Slice baguettes in half, lay on baking sheet, and bake in the oven at 350 degrees for 10 minutes so bread can get crispy. Remove bread, add toppings, and place back in the oven for 10 minutes. Broil for 1 minute to get cheese brown and bubbly.

Lemon Bars

Monday, April 25, 2011
We have a tried and true lemon bar recipe in our house, why try another? Oh because maybe whenever I spotted this recipe over at Lick the Bowl Good, I knew I would have a new house favorite on my hands. What really got my attention was how thick the bars were, which I loved. I remembered the old recipe we used having pretty thin bars; delicious, but thin. I wanted thick, gooey, creamy, buttery, lemon-tastic bars!


Besides the juicing of the lemons, this recipe is sooo easy. Juicing does take some time, but the result is worth it. And I'm pretty sure a lot of people can juice better than I can. Zesting is fun and easy, though=) I'm insanely in love with my zester. I went so long without one and I'm so happy to finally have one in my life! Okay, enough about my zester love affair.


I know that lemon is the obvious star of lemon bars, but there needs to be given an M.I.P. award for this recipe. The buttery thick shortbread base is beyond phenomenal! These bars definitely delivered. I brought them into school and got rave reviews. I also ended up eating a number that need not be spoken out loud amount of bars by myself...


Lemon Bars
adapted from Lick the Bowl Good
Makes 24ish bars

For the crust:
  • 3/4 lb. unsalted butter, at room temperature
  • 3/4 cup granulated sugar
  • 3 cup flour
  • 1/4 tsp. kosher salt
For the filling:
  • 6 large eggs, at room temperature
  • 3 cups granulated sugar
  • 2 Tbsp. finely grated lemon zest
  • 1 cup freshly squeezed lemon juice
  • 1 cup flour
  • Confectioners' sugar, for dusting
Butter a 9 x 13 x 2" baking pan, then line the bottom and sides of the pan with parchment paper.


For the crust: Cream the butter and sugar until light in the bowl of an electric mixer fitted with the paddle attachment.
Combine the flour and salt and, with the mixer on low, add to the butter mixture until just mixed.
Dump the dough onto a well-floured board and gather into a ball. Flatten the dough with floured hands and press it into the bottom of prepared pan.
Chill the pan while the oven preheats to 350° F.
Bake the crust for 15 to 20 minutes, until very lightly browned. Let cool on a wire rack. Leave the oven on.

For the filling: Whisk together the eggs, sugar, lemon and lime zest, lemon and lime juice, and flour.
Pour over the crust and bake for 35-45 minutes, until filling is set.
Let cool to room temperature. Cut into squares or triangles and dust with confectioners' sugar.


My kitties! Millie and Howie, respectively. They are so happy it's getting warm out because then they can sit in front of our door and watch the world outside. They are they cutest!

Dinner Updates

Wednesday, April 20, 2011

I have been making some fabulous dinners. I may sound a little full of myself, but that's because I am. I'm full in my stomach from all these incredible dinners! Get it?! Me neither... But seriously, I need to give some shout outs to where I've been getting my dinner inspirations from. Now, I'm not very skilled at the whole photography thing, so I decided not to take pictures of most of the meals. But I captured a few for you=)

Pizza Mac N' Cheese- This in in my family's top 5 favorite meals I've made! Cassie Craves is such a great dinner resource whenever I don't know that to make. She has never steered me wrong and I love this recipe. It sounds like a heavy dish, but there's a ton of veggies in there surprisingly. I definitely will be making this again.

Chicken with Pesto Mushrrom Cream Sauce- One of the comments we kept saying about this dish was how juicy the chicken was! I don't know if that was more due to the recipe or me, but we loved that. The pesto mushroom cream suace was great and great for dipping breadsticks into. This meal packed so much taste and it reminded me of something you would get at Olive Garden. Thanks again Cassie!
Garlic Breadsticks- I was so excited to make these! I've never thaought about making something like this from scratch and it always seemed impossible. But really, these were incredibly easy. I loved adding butter, garlic, italian seasoning, and tons of parmesan cheese on top. We really personalized them to our tastes. I made them really huge, but that didn't stop me from having seconds=)
Mexican Sour Cream Rice- This was from quite awhile ago but I remember we defnitely enjoyed it!

Salsa Verde Turkey Burgers- These were some fantastic looking burgers! They were so fun to make and I loved the avocado aioli sauce that came with it. I went a little crazy with the red onion, so don't do that. Overall, these were a disappointement. They looked great and had some great components, but the taste just wasn't there. No amount of salt could fix it either, though ketchup helped.='(

Cowboy Quesadillas- These were very easy to put together and since we haven't had quesadillas in awhile, they were much welcomed. I especially loved the bbq ranch dipping sauce, but I am a lover of all dips=) So this gets a thumbs up!

Well these are some of the meals I have been cooking up for my family! It's a little strange for an 18 year old girl to be cooking dinner for her family most nights, but I love it! Hopefully I post up our dinners sooner so I can remember what we thought of them while it's still fresh in my mind. It was one of my New Years Resolutions to cook more homemade dinners for my family, and so far  I think I'm doing fabulously=)

Coffee and Walnut Cake

Tuesday, April 19, 2011

So I made another recipe from this really obcure baking book I received for Christmas. Obscure like, it has no author listed anywhere. My friend found it at Half Priced Books, and it's a little strange at times. Baking times and temperatures aren't always important, and neither is any kind of order. But that's only for some recipes=)
Anyways, I had been dying to try another recipe out of the book to see if it could actually produce some good stuff. I choose another coffee item. What can I say? I love coffee even though I don't drink it. Well that's actually a lie. I could drink any variation of iced coffee everyday for the rest of my life! Where was I going with this? Oh yeah, the cake. I happened to have some walnuts around and a perfect storm of flavors had my mind and taste buds intrigued.

I made this awhile ago, but I remember liking it a lot! I remember the frosting being pretty sugary, but then again I did go fristing heavy=) Overall this worked as a nice snack cake. I do not think I would serve it to use for a celebration cake, but tea time or a brunch would be a good option.

Coffee &Walnut Cake
from What's Cooking, Baking
serves 8

3/4 cup butter
3/4 cup brown sugar
3 eggs, beaten
3 tbsp strong black coffee (I always use Nescafe packets and dissolve them into water)
1 1/2 cups self-rising flour (I used regular flour with extra baking soda)
1 1/2 tsp baking powder
1 cup walnut pieces
walnut halves to decorate with

Preheat the oven to 350 degrees. Grease and flour the bottoms of two 8-inch round layer cake pans.

Cream together the butter and brown sugar until pale and fluffy. Gradually add the eggs, beating well after each addition. Beat in the coffee.

Sift the flour and baking powder into the mixture, then fold in lightly and evenly with a metal spoon. Fold in the walnut pieces.

Divide batter between the prepared cake pans and smooth level. Bake in preheated oven for 20-25 mins, or until golden brown and springy to the touch. Turn out onto a wire rack to cool.

Frosting
1/2 cup butter
1 3/4 cup powdered sugar
1 tbsp strong black coffee (same method as before)
1/2 tsp vanilla extract

Beat together the butter, powdered sugar, coffee and vanilla, mixing until smooth and creamy.

Use about half of the frosting to sandwich the cakes together, then spread the remaining frosting on top and swirl with a metal spatula. Decorate with walnut halves.

Buttermilk Waffles

Friday, April 15, 2011
Guess what the lovely CSN store fairies brought me this time: a waffle maker! Woot woot! I have never made homemade waffles before (I mean well duhh since I've never owned a waffle maker) and when I see recipes for waffles on blogs I immediately skip them because I know I'll never be able to make them anyways. But now I can!!


So needless to say I don't have waffles. Like ever. My only memories of having waffles at home are of the frozen ones that you pop in the toaster or microwave. Why did people ever like those? I know I never did. They were always dry and... well just gross. So for my first try at homemade waffles, I had no idea what to expect!

You should also know that I'm a pancake girl through and through. Since I didn't grow up with waffles, we ALWAYS had pancakes growing up. For a year or two, we even had chocolate chip pancakes every Sunday. And anytime I go to breakfast places to eat, I ALWAYS order pancakes. You can bet on it. So turning to waffles almost felt like treason!

Shhhh! Don't tell pancakes but: I am in love with waffles. This recipe rocked my world! I honestly don't think I need to try any other basic waffle recipe. That's pretty ballsy to say after only trying one period, but they were too good! They buttermilk made them so soft and moist. They were actually pretty eggy, but I really enjoyed it. So if you're not into that then maybe you won't like them as much. But really, you should give these a try!


Buttermilk Waffles
from Sugarcrafter

Ingredients
  • 3 eggs, separated
  • 1 3/4 cups buttermilk
  • 1 stick unsalted butter, melted
  • 1/2 tsp vanilla extract
  • 1 3/4 cups flour
  • 1 1/2 tsp baking powder
  • 1 tsp baking soda
  • 1/2 tsp salt
  • 1/3 cup sugar
Preheat the waffle maker to medium-high heat, and preheat your oven to 200 degrees (for keeping the cooked waffles warm). In a large bowl, whisk together the egg yolks, buttermilk, butter, and vanilla until well-blended.

In a medium bowl, whisk together the flour, baking powder, baking soda, salt, and sugar.

Add the flour mixture to the egg yolk mixture and whisk until smooth. In another medium bowl, whisk the egg white until stiff peaks form. Using a rubber spatula, gently fold the egg whites into the batter.

Pour about 1/3 cup of the batter into each well of the waffle maker and close the lid. Cook until crisp (it took 5-6 minutes for my waffle maker). Repeat with the remaining batter. Transfer the finished waffles to a baking sheet, and place them in the oven to keep warm until you are ready to serve them. Serve with butter, jam, maple syrup, fruit, whipped cream…whatever your heart desires!


I can't wait to try more waffle recipes! I need to be more creative, though.  
Any suggestions for what waffle recipe I should try next??

Red Velvet Brownies with White Chocolate Brownies

Thursday, April 14, 2011
Ugh. So my computer is dead once again. My sister is gracious enough to let me use hers here and there so I can check blogs and such things. Since I've been MIA for a little bit, I haven't gotten to show you guys what I have been making. Granted, I haven't taken too making pictures either=/ Oops. But bear with me here.


These brownies were OMG good. Really really good. Like eat half of the 8x8 pan in one evening good. But you should probably not do that. Do as I say, not as I do.

It calls for a white chocolate frosting which threw me a little because I'm used to the classic pairing of cream cheese frosting. But I trusted Jessica at How Sweet It Is (I mean who couldn't possibly trust her?). The brownies were soooo good. Raise-the-roof-swing-low-sweet-chariot good.

So I told you they were so good and that I had to eat so many, right? Well... I made a second batch. And doubled the recipe. And dyed them green. And made a cream cheese frosting for good ole time's sake! Holy yumm. Green for St. Paddy's day. (See how behind in my posting I am?) I brought the pan to school (or else you know I would have eaten then for breakfast, lunch, and dinner) and my friends helped me gobble them down. Although I will say that bringing your friends green my give you some strange looks. However, one bite will change their minds!

Red Velvet Brownies with White Chocolate Frosting
from How Sweet It Is

1/2 cup butter, at room temperature
1 1/2 cups sugar
2 eggs
2 teaspoons vanilla extract
1 1/4 cups all purpose flour
1/4 teaspoon salt
3 tablespoons cocoa powder
2 tablespoons red food coloring
2/3 cups chocolate chips (optional, I omitted)

Preheat oven to 350.
Butter and flour an 8 x 8 cake pan.

In a small bowl, combine cocoa powder, red food coloring, and 1 teaspoon vanilla to create a paste.
In the bowl of an electric mixer, cream butter and sugar until fluffy. Add eggs one at a time, then add remaining teaspoon of vanilla. With the mixer on medium speed, add in cocoa powder mixture. Beat until batter is completely red. (If at this time your batter is NOT red, you can add a little more food coloring if desired. Color will depend on brand.) Add flour and salt, mixing until just combined. Fold in chocolate chips.

Spread in the 8 x 8 pan. Bake for 25-30 minutes, or until toothpick inserted in center comes out clean. Let cool completely before frosting.


White Chocolate Frosting
1 stick of butter, at room temperature
2 1/2 cups powdered sugar
1 teaspoon vanilla extract
4 ounces white chocolate, melted
1-2 tablespoons milk (or more if needed)

Cream butter in an electric mixer until fluffy, then add vanilla. Slowly add in powdered sugar 1/2 cup at a time with the mixer on low speed. Add in melted white chocolate and beat until incorporated. To reach desired consistency, add in milk 1 teaspoon at a time with mixer on low speed. If frosting becomes too liquidy, simple add additional sugar.

 Pretty blurry huh? Well you get the picture. See Jessica's blog for a drool-worthy post!

Hello...? And Cinnamon Rolls!

Tuesday, April 12, 2011

Wow. It's seriously been so long. I mean I had an intense Spring Musical to deal with that did phenomenally, and then there was when our computer crashed=( Thank goodness for the web enabled phone I got for my birthday in January. I seriously don't know if I would have made it the week and a half. But I'm back! (I know I said that last time, but this time I mean it!) Though my blogging skills have been mediocre as of late, I promise my baking has been doing just fine. For example:


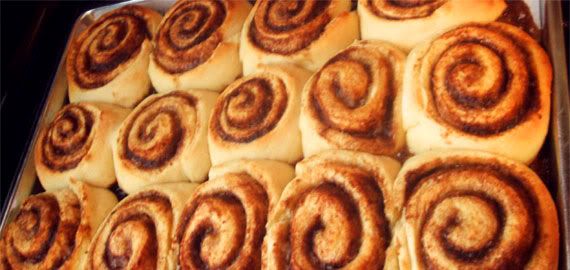
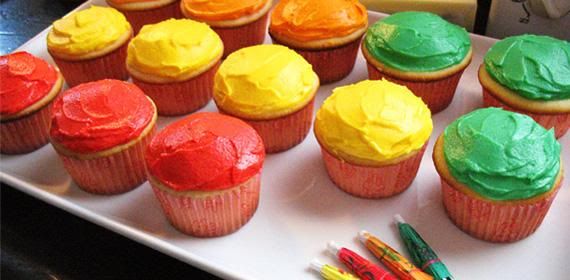
Oh yeahhhhh. Those are indeed cinnamon rolls with cream cheese frosting. And guess what? I made them again about a week or too later. It is completely necessary. Andddddd, I have some ideas for new twists on cinnamon rolls that I can't wit to try and then show you guys. (I actually tried one of my ideas and let's just say it didn't work out too well. I burned it completely.) So, make some cinnamon rolls, and sit back and wait for the blog posts to come rolling in! In my absence, you won't believe the number of these cupcakes I had to bake. In fact, some just came out of the oven less than an hour ago.


Cinnamon Rolls
Recipe given to me by my mother. I will NEVER EVER use another recipe. This one is perfect. Same with the icing. NOTHING beats it.

Dough
1 tablespoon dry yeast
1 cup warm milk
1/3 white sugar
1/2 cup melted butter
1 teaspoon salt
2 eggs
4 cups of flour

Dissolve yeast in warm milk. Add the rest of the ingredints and mix well. Knead into a ball. Let rise until doubled in size. When ready, roll out to about 1/4 inch thick. Spread with filling.

Filling
1/4 cup butter, softened
1 cup brown sugar
3 tablespoons cinnamon

Spread butter evenly over dough. Sprinkle sugar and cinnamon over dough evenly as well. Roll dough up. Slice roll into 1 inch slices. Place in a parchment paper lined pan. Let rise again until doubled. Bake 10 minutes at 400 degrees.

Icing
1/2 cup butter, softened
1 1/2 cups powdered sugar
1 oz. cream cheese
2 tablespoons whipping cream
1 teaspoon vanilla extract
pinch of salt

Beat until fluffy. When rolls are hot, spread lots of icing on them.

Tip: To make these the night before,skip the final rising step. Let rise in the fridge overnight and bake them in the morning.

Long Time No See!

Tuesday, March 15, 2011
Hey guys! I know I know. Where have I been?? Well my school's Spring musical has been taking an overwhelming toll on my free time, but it's totally worth it. I have a really nice part this year and I'm enjoying every second=) We sold out every single show so we are buying the rights once again to keep it going even longer so more people can come! That's the first time in the history of our school! I feel so honored to be a part of it, especially in my senior year. I do have some recipe sot share with you guys soon, but let me tell you about something else first.

I have a love affair with CSNstores. First off, they have the friendliest people working there. They couldn't be better at customer support. Not that I've ever had any problems with them! Second, the ship in record time! I'm totally serious. I get my products in less than two days every time! Lastly, they have all kinds of products. Being the avid baker that I am, I normally head straight to the kitchen appliances and bake ware, but I've found myself venturing to new areas recently. Furniture, recessed lighting, or storage options. The possibilities are endless! I love this website and I just ordered some new products from them so I can't wait to show you guys how I put them to good use!

Oatmeal, Cinnamon Chip, and Pecan Cookies

Saturday, February 26, 2011

Hi all=) So the past few days I have been sick. Like REALLY sick=( Even as I type this post I'm still only just recovering. That being said, food is the last thing on my mind. I've barely been eating and I prefer to just sleep all day and watch tv. But I wanted to keep you guys updated and let you know what's going on with me.

Don't worry, my lovely boyfriend has been taking amazing care of me=) When I was starting to feel like I could eat again he made me tomato soup and the best grilled cheese sandwich ever! Whole wheat bread with swirled Colby jack cheese. Mmmmmmmm=) And he even skipped his after school track practices to bring me chicken noodle soup and OJ. He's the best!

Even so, I have this recipe I made before I got sick and I wanted to share it with you. You probably have all the ingredients for in your house. I knew I wanted to use up my cinnamon chips so I saw this recipe and adapted it to accommodate my needs. They have a great texture, and it has been awhile since I've had a good oatmeal cookie. We loved the flavors and though chocolate chips were called for in the original recipe, I liked the cinnamon chips better because combined with the pecans it tasted like candied nuts. Kinda. They are just really good so you should try them!

Oatmeal, Cinnamon Chip, and Pecan Cookies

adapted from Smitten Kitchen

Makes about 3 dozen cookies

8 tablespoons unsalted butter, at room temperature
3/4 cup sugar
1 cup light brown sugar, firmly packed
1 teaspoon salt
1 teaspoon vanilla extract
2 large eggs
1 1/2 cups flour
1 teaspoon baking soda
1/2 teaspoon ground cinnamon
1/4 teaspoon ground nutmeg
1/8 teaspoon ground clove
1 cup quick-cooking oats
1 cup chopped pecans
10 ounces cinnamon chips

Preheat oven to 350°F. Using an electric mixer, beat the butter in a bowl until light and fluffy. Add both sugars, salt, and vanilla, and beat until well mixed, about three minutes. Stir in eggs, one at a time. Sift together the flour, baking soda, cinnamon, nutmeg, and clove in a separate bowl. Add half of the flour mixture to the butter with the mixer on low speed. Once the flour has been incorporated, add the second half. Stir in the oats, pecans, and chocolate chips.

Drop the dough, by the tablespoon, onto the cookie sheet and bake for 10 to 12 minutes or until golden. Remove from the oven and cool the cookies on a rack. Store at room temperature in a cookie jar or other airtight container.

Banana Cinnamon Chip Bread with Cinnamon Sugar Topping

Tuesday, February 22, 2011

Well I've gone a little longer than I wanted to without posting anything. Not good. But I'm back and enjoying a lovely snow day=) I mean I was all for the good weather to start coming, but why not end the snow season with a bang? Is it a bad thing that I constantly check the 15-day forecast on my phone everyday? I don't think so. I just can't wait for th
e warm weather to start and stay here! But enough about the weather, let's talk about what you really came here for: the food.

This here loaf of bread was a recipe I went searching for. I found a couple good cinnamon chip bread recipes, but they strongly suggested only the use of shortening, and I didn't want to use that. But, lo and behold, I was able to find one and make it and post it here for you! I love using the cinnamon chips that Ingrid sent me any way I can.


Freezing bananas before the go bad is one of my favorite tricks! I can then pull th
em out of the freezer whenever I need to and let them thaw for me to use. This was exactly what I did for this recipe. I happened to have all the ingredients on hand, which is a definite plus.

The cinnamon sugar topping seems like a lot, but it adds the perfect crunch on top. I love taking a bit with crunchy pieces and soft pieces. Because let me tell you, this was a moist bread! It wasn't dry but it left enough room for a generous slab of butter on top;)


Banana Cinnamon Chip Bread with Cinnamon Sugar Topping
from Two Peas and Their Pod

1 1/2 cups all purpose flour
1 teaspoon baking soda
1 teaspoon cinnamon
1/4 teaspoon salt
3 over-ripe bananas, smashed up
1/3 cup melted butter
3/4 cup sugar
1 egg, beaten
1 tsp vanilla
3/4 cup cinnamon chips

For the cinnamon sugar topping:
1/3 cup sugar
1 Tbs cinnamon

1. Preheat oven to 350 degrees. Spray a 8 1/2 by 4 1/2 loaf pan with cooking spray. Dust it lightly with flour and set aside.
2. Whisk the flour, baking soda, cinnamon, and salt together in a small bowl. Set aside.
3. Mix the bananas, butter, sugar, egg, and vanilla together in a medium bowl. Add in the flour mixture and carefully stir. Don’t over mix. Add in the cinnamon chips and gently stir.
4. In a small dish, mix together the 1/3 cup sugar and 1 Tablespoon of cinnamon.
5. Add the batter to the loaf pan and smooth out with a spatula. Sprinkle the cinnamon sugar topping generously over the batter.
6. Bake bread for 50-60 minutes, or until golden brown and toothpick comes out clean. Transfer to cooling rack.
7. Let bread cool for 1o minutes and then remove from pan. Cool, slice, and enjoy.

Cream Puff Cake

Monday, February 14, 2011

It's Valentine's Day! And this year I have a very special valentine=) Since Valentine's Day fell on a school day, we celebrated over the weekend. Homemade fancy buffalo chicken dip with homemade garlicky pita chips were for dinner. These chips are now a beloved staple in our house, but it almost seems like too basic a recipe to post about. We had also planned to enjoy a wonderful white chocolate fondue, but we pigged out on the dip too much. Next week though=).


For the actual day, we packed lunch for each other and traded at school. He got the left over dip and chips, and I got two slices of banana bread with nutella slathered in between. (This was my idea but I give him credit for putting it together so wonderfully!)


This cake a great idea for a Valentine's dessert. It has a sophisticated appeal, but it couldn't be easier, or made with cheaper ingredients. Let me tell you: Eggs, butter, milk, vanilla pudding, whipped cream, chocolate... I even took the high road and melted my
own chocolate rather than use Hershey's syrup (Yuckkkk.)


I made this cake with my valentine too! It was his idea to make it, and boy was I surprised! I have always wanted to make cream puffs, so it was great to have an excuse to finally do so. We had some ingredient issues when we picked up the wrong kind of pudding for the filling, but he graciously offered to run out and get it. Even in the freezing weather.


A lot of people loathe this holiday, but this is my first truly meaningful Valentine's Day. It's the first time I have someone to share it with. But the thing I realized was that it's not the day that made us love each other, but we continually love each other this day just is a reminder. But I don't think we considered this day an epic moment in our relationship. It was good as always, but we didn't center ourselves around the holiday itself. I don't know, these are just random thoughts=)

Cream Puff Cake
via Allrecipes

1 cup water
1/2 cup butter
1 cup flour
4 eggs

1 8 oz pkg cream cheese
4 cups milk
3 pkgs of instant french vanilla pudding

whipped cream
melted chocolate

Directions:
Preheat oven to 400 degrees F (200 degrees C).
In a large heavy saucepan, heat butter and water to boiling over medium-high heat. Add flour and reduce heat to low. Cook and stir until it forms a ball and pulls away from the pan. Remove from heat and transfer to a large bowl. Beat in eggs, one at a time, beating well after each egg.
Spread in bottom and up the sides of an ungreased 9x13 inch pan. Bake at 400 degrees F for 35 minutes. Cool completely.

To make the filling: In a large bowl, combine cream cheese and milk and beat until smooth. Add pudding mix and beat until thickened. Spread over cooled shell.

Top with whipped cream, and drizzle chocolate over the top.