Oatmeal, Cinnamon Chip, and Pecan Cookies

Saturday, February 26, 2011

Hi all=) So the past few days I have been sick. Like REALLY sick=( Even as I type this post I'm still only just recovering. That being said, food is the last thing on my mind. I've barely been eating and I prefer to just sleep all day and watch tv. But I wanted to keep you guys updated and let you know what's going on with me.

Don't worry, my lovely boyfriend has been taking amazing care of me=) When I was starting to feel like I could eat again he made me tomato soup and the best grilled cheese sandwich ever! Whole wheat bread with swirled Colby jack cheese. Mmmmmmmm=) And he even skipped his after school track practices to bring me chicken noodle soup and OJ. He's the best!

Even so, I have this recipe I made before I got sick and I wanted to share it with you. You probably have all the ingredients for in your house. I knew I wanted to use up my cinnamon chips so I saw this recipe and adapted it to accommodate my needs. They have a great texture, and it has been awhile since I've had a good oatmeal cookie. We loved the flavors and though chocolate chips were called for in the original recipe, I liked the cinnamon chips better because combined with the pecans it tasted like candied nuts. Kinda. They are just really good so you should try them!

Oatmeal, Cinnamon Chip, and Pecan Cookies

adapted from Smitten Kitchen

Makes about 3 dozen cookies

8 tablespoons unsalted butter, at room temperature
3/4 cup sugar
1 cup light brown sugar, firmly packed
1 teaspoon salt
1 teaspoon vanilla extract
2 large eggs
1 1/2 cups flour
1 teaspoon baking soda
1/2 teaspoon ground cinnamon
1/4 teaspoon ground nutmeg
1/8 teaspoon ground clove
1 cup quick-cooking oats
1 cup chopped pecans
10 ounces cinnamon chips

Preheat oven to 350°F. Using an electric mixer, beat the butter in a bowl until light and fluffy. Add both sugars, salt, and vanilla, and beat until well mixed, about three minutes. Stir in eggs, one at a time. Sift together the flour, baking soda, cinnamon, nutmeg, and clove in a separate bowl. Add half of the flour mixture to the butter with the mixer on low speed. Once the flour has been incorporated, add the second half. Stir in the oats, pecans, and chocolate chips.

Drop the dough, by the tablespoon, onto the cookie sheet and bake for 10 to 12 minutes or until golden. Remove from the oven and cool the cookies on a rack. Store at room temperature in a cookie jar or other airtight container.
Banana Cinnamon Chip Bread with Cinnamon Sugar Topping

Tuesday, February 22, 2011

Well I've gone a little longer than I wanted to without posting anything. Not good. But I'm back and enjoying a lovely snow day=) I mean I was all for the good weather to start coming, but why not end the snow season with a bang? Is it a bad thing that I constantly check the 15-day forecast on my phone everyday? I don't think so. I just can't wait for th
e warm weather to start and stay here! But enough about the weather, let's talk about what you really came here for: the food.

This here loaf of bread was a recipe I went searching for. I found a couple good cinnamon chip bread recipes, but they strongly suggested only the use of shortening, and I didn't want to use that. But, lo and behold, I was able to find one and make it and post it here for you! I love using the cinnamon chips that Ingrid sent me any way I can.


Freezing bananas before the go bad is one of my favorite tricks! I can then pull th
em out of the freezer whenever I need to and let them thaw for me to use. This was exactly what I did for this recipe. I happened to have all the ingredients on hand, which is a definite plus.

The cinnamon sugar topping seems like a lot, but it adds the perfect crunch on top. I love taking a bit with crunchy pieces and soft pieces. Because let me tell you, this was a moist bread! It wasn't dry but it left enough room for a generous slab of butter on top;)


Banana Cinnamon Chip Bread with Cinnamon Sugar Topping
from Two Peas and Their Pod

1 1/2 cups all purpose flour
1 teaspoon baking soda
1 teaspoon cinnamon
1/4 teaspoon salt
3 over-ripe bananas, smashed up
1/3 cup melted butter
3/4 cup sugar
1 egg, beaten
1 tsp vanilla
3/4 cup cinnamon chips

For the cinnamon sugar topping:
1/3 cup sugar
1 Tbs cinnamon

1. Preheat oven to 350 degrees. Spray a 8 1/2 by 4 1/2 loaf pan with cooking spray. Dust it lightly with flour and set aside.
2. Whisk the flour, baking soda, cinnamon, and salt together in a small bowl. Set aside.
3. Mix the bananas, butter, sugar, egg, and vanilla together in a medium bowl. Add in the flour mixture and carefully stir. Don’t over mix. Add in the cinnamon chips and gently stir.
4. In a small dish, mix together the 1/3 cup sugar and 1 Tablespoon of cinnamon.
5. Add the batter to the loaf pan and smooth out with a spatula. Sprinkle the cinnamon sugar topping generously over the batter.
6. Bake bread for 50-60 minutes, or until golden brown and toothpick comes out clean. Transfer to cooling rack.
7. Let bread cool for 1o minutes and then remove from pan. Cool, slice, and enjoy.

Cream Puff Cake

Monday, February 14, 2011

It's Valentine's Day! And this year I have a very special valentine=) Since Valentine's Day fell on a school day, we celebrated over the weekend. Homemade fancy buffalo chicken dip with homemade garlicky pita chips were for dinner. These chips are now a beloved staple in our house, but it almost seems like too basic a recipe to post about. We had also planned to enjoy a wonderful white chocolate fondue, but we pigged out on the dip too much. Next week though=).


For the actual day, we packed lunch for each other and traded at school. He got the left over dip and chips, and I got two slices of banana bread with nutella slathered in between. (This was my idea but I give him credit for putting it together so wonderfully!)


This cake a great idea for a Valentine's dessert. It has a sophisticated appeal, but it couldn't be easier, or made with cheaper ingredients. Let me tell you: Eggs, butter, milk, vanilla pudding, whipped cream, chocolate... I even took the high road and melted my
own chocolate rather than use Hershey's syrup (Yuckkkk.)


I made this cake with my valentine too! It was his idea to make it, and boy was I surprised! I have always wanted to make cream puffs, so it was great to have an excuse to finally do so. We had some ingredient issues when we picked up the wrong kind of pudding for the filling, but he graciously offered to run out and get it. Even in the freezing weather.


A lot of people loathe this holiday, but this is my first truly meaningful Valentine's Day. It's the first time I have someone to share it with. But the thing I realized was that it's not the day that made us love each other, but we continually love each other this day just is a reminder. But I don't think we considered this day an epic moment in our relationship. It was good as always, but we didn't center ourselves around the holiday itself. I don't know, these are just random thoughts=)

Cream Puff Cake
via Allrecipes

1 cup water
1/2 cup butter
1 cup flour
4 eggs

1 8 oz pkg cream cheese
4 cups milk
3 pkgs of instant french vanilla pudding

whipped cream
melted chocolate

Directions:
Preheat oven to 400 degrees F (200 degrees C).
In a large heavy saucepan, heat butter and water to boiling over medium-high heat. Add flour and reduce heat to low. Cook and stir until it forms a ball and pulls away from the pan. Remove from heat and transfer to a large bowl. Beat in eggs, one at a time, beating well after each egg.
Spread in bottom and up the sides of an ungreased 9x13 inch pan. Bake at 400 degrees F for 35 minutes. Cool completely.

To make the filling: In a large bowl, combine cream cheese and milk and beat until smooth. Add pudding mix and beat until thickened. Spread over cooled shell.

Top with whipped cream, and drizzle chocolate over the top.

Cupcakes and a New Look

Saturday, February 12, 2011

Thank you for being patient while I make some changes around here. I definitely noticed a need for an upgrade to my blog, and I finally found that inspiration that pushed me to update my blog and renew my spirit. And it came from these cupcakes. Let me start at the beginning...


I love baking, but most of all I love baking cupcakes. Even better is when I see people try my cupcakes and they enjoy them. Because of this, it only made sense for me to want to bake cupcakes for others. At the same time, I'd like to make a profit from it too since ingredients aren't cheap.


Time passed where I was still trying to work everything out in my hea
d and figure out what this could mean for me. Eventually I realized if I wanted to turn this into a business of any kind, I needed a name and logo. After some thought I choose a name and my sister hooked me up with a friend of hers who designs logos. We worked together and created something pretty cool. I'll share it with you soon!


After seeing this, an idea that had floated in my head finally put to paper or an abstract idea becoming concrete... well it was a great feeling. At this point, I had my name and logo, I knew what I wanted to do, and I was fairly good at it, but I got stuck. Then school took over and my business ideas took a back burner to life.


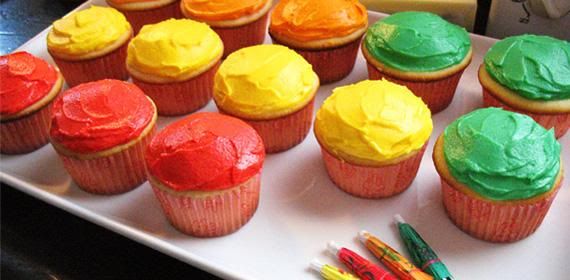
Here's where these recent cupcakes come in. Up until this point I didn't care what my cupcakes looked like. It was how they tasted that mattered, right? Wrong. So so wrong. People want to buy and eat pretty cupcakes. Otherwise my "homely" cupcakes would be overlooked like my favorite discontinued television show (R.I.P
Pushing Daisies). After winning a giveaway on Ingrid's blog, I acquired a Williams-Sonoma gift card. And I had just the thing in mind to buy. I got myself a brand new mechanical pastry bag. Kind of a weird name, but you know what I mean. This was the fresh start I needed to start making cupcakes that not only tasted great, but looked great.


And these my friends were the cupcakes that did it. They inspired me to break out this new toy and make some dang good (and good looking cupcakes). At first, these cupcakes were just for me and family and friends to enjoy, but my sister asked if I would give some to her so she could bring them into her work. Of course I said yes! I gave her two dozen and she came home empty handed. Her first words, "You should have given me business cards to hand out because everyone loved them!"


I still had some cupcakes left and so I gave they out to neighbors and my boyfriends family. After delivering them to each home, I received phone calls from each telling me they were the best cupcakes they have ever had! In fact, two of them asked me to make cupcakes for them next week and they would pay me! With this one cupcake recipe, I was back on the map. I found my love for starting my own small business again, and I don't ever want to forget it. I'm heading into college next year planning on studying entrepreneurship. Although many people change their minds, this is where I feel drawn so I'm going to go with it.


If I wasn't clear earlier, this cupcakes were out of this world. The cookie dough center is like a soft cookie and the cookie dough frosting makes the cupcake what it is. I spent a lot of time making my presentation of them perfect, but I still have a ways to go in perfecting my piping skills.


Chocolate Chip Cookie Dough Cupcakes with Cookie Dough Buttercream

frosting and cookie dough from
Kevin and Amanda
cupcakes from Martha Stewart

For the cookie dough:
2 sticks softened butter
3/4 cup sugar
3/4 cup brown sugar
4 tbsp milk
1 tbsp vanilla
2 1/2 cups all purpose flour
1/4 tsp. salt
1 cup mini chocolate chips

For the cupcakes:
3 cups cake flour (not self-rising)
1 1/2 cups all-purpose flour
3/4 teaspoon baking soda
2 1/4 teaspoons baking powder
1 1/2 teaspoons coarse salt
1 cup plus 2 tablespoons (2 1/4 sticks) unsalted butter, room temperature
2 1/4 cups sugar
5 large whole eggs plus 3 egg yolks, room temperature
2 cups buttermilk, room temperature

2 teaspoons pure vanilla extract

For the frosting:
3 sticks softened butter
3/4 cup light brown sugar, packed
3 1/2 cups powdered sugar
1/2 tsp. salt
2 tbsp. milk
1 tsp. vanilla extract

Directions:

To make the cookie dough, combine the butter and sugars in a mixing bowl and cream on medium-high speed until light and fluffy, about 2 mins. Beat in milk and vanilla until incorporated and smooth. Beat in the flour and salt until just combined. Stir in the chocolate chips. Using a 1.5 tbsp scoop, shape the dough into balls or tubes. Freeze on a parchment lined baking sheet overnight.

To make the cupcakes:

1) Preheat oven to 350 degrees. Line standard muffin tins with paper liners. Sift together both flours, baking soda, baking powder, and salt.

2) With an electric mixer on medium-high speed, cream butter and sugar until pale and fluffy. Reduce speed to medium. Add whole eggs, one at a time, beating until each is incorporated, scraping down sides of bowl as needed. Add yolks, and beat until thoroughly combined. Reduce speed to low. Add flour mixture in three batches, alternating with two additions of buttermilk, and beating until combined after each. Beat in vanilla.

3) Divide batter evenly among lined cups, filling each 2/3 full.
Place a frozen cookie dough ball on the top center of each cupcake.

Bake at 350 for 16-18 mins.

To make the frosting, combine the butter and brown sugar in a mixing bowl and cream on medium-high speed until light and fluffy. Beat in the powdered sugar until smooth. Beat in the salt, milk, and vanilla extract until smooth and combined.

Frost the cupcakes and sprinkle with mini chocolate chips!

With Martha's Vanilla Cupcake recipe I got 4 dozen cupcakes! It makes a lot but you'll sure want them all!

Weekly Dinners #2

Wednesday, February 9, 2011

So I have been up to a lot lately. That makes having regular dinners difficult=/ I have two major papers I'm trying to start early so I am not overwhelmed, but the deadlines are still coming up on me. And, I'm trying to still choose between two colleges. It's sooo difficult=( I'm staying over night at one of them in 2 weeks so hopefully that will help my decision.


Then, throw in musical rehearsals after school most days. I love musical so much but it does eat away at my time. I have a really nice role this year so I can't complain too much=) We're doing Little Shop of Horrors this year. If you know anything about the show you probably know there's a blood thirsty plant in it. We have rubber bloody body parts and everything. My role is one of the Ronettes. We're a group of doo-wap style singers that narrate the show basically. I'm on stage a ton dancing and singing, I have a solo, and we get some really fun costume changes! I'm so excited=)


Indian Butter Chicken with Basmati Rice:
As soon as I saw this dish, I knew I was going to make it no matter what. I am SOOO glad I made this. This is the best dinner I have ever made. The basmati rice was so easy I might even make it more often. The chicken and the sauce. I am speechless. Utterly speechless. I loved this beyond belief. Ok. Done talking about it now.


Lemon Dressing Drizzled Chickpea and Sweet Pepper Arugula Salad
:
I wanted to have some lighter and refreshing options for dinner. This was good for an evening when we wanted a lighter side to some leftovers. And, I ended up having it for lunch for the rest of the week. I might try adding some mustard to the dressing (which was good already) for more flavor. Pretty good salad. I love chickpeas and peppers and the arugula has a citrus bite to it.

Chicken Lasagna:

Not photographed, due to its sloppy and unphotogenic manner, but oh so delicious. We can't actually have lasagna at my house because my dad and my sister don't like red sauce. If you've been reading my blog for any length of time you may have realized what kind of picky eaters I have to deal with on a day to day basis. Not cool. But, I decided to appeal to them for this meal. This is lasagna with a white sauce and a ton of flavor. Definitely 5 stars.


Winning recipe of Weekly Dinners #2? Indian Butter Chicken with Basmati Rice. I must make this again!

7-layers Bar (minus 1 layer)

Monday, February 7, 2011

Snow day! Woohoo! We've had some delays, and that only means one thing: baking day! Duhhhh. I had a ton of items on my "to-bake" list. But what do I go and do, I bake something not even on it! Oh well, it was something I've wanted to try. These were so fun to make too=)


I had a bunch of random bags of chips I had started but never finish
ed using, so I figured this was a good way to get rid of them. And, we FINALLY had some sweetened condensed milk in the house and I was dying to use it. I LOVE sweetened condensed milk!


Anyway, as I started making this beginning with layer one, I didn't think the graham cracker base was enough to fill a 13 x 9 pan. It looked like just enough for a square 8 x 8 pan. So that's what I used. Which meant that by decreasing the surface area I would
have a lot more of my filling items squeezed into a smaller space. Problem? I think not. Just more to love in each bite!


I omitted the coconut. Hence the title. And I love all the flavors going on i
n this. Nuts, Honestly this bars were mmm, mmm, good! There were super rich and ooey gooey! I'm so glad I made them. They're something I won't make often because of how decadent they are, but when I do it will be a great treat to have!


(The recipe I'm posting is including all seven layers.)


7-Layers Bars
from Brown Eyed Baker

1 cup sweetened flaked coconut
8 tablespoons (1 stick) unsalted butter
9 graham crackers (5 ounces), crushed
1 cup finely chopped walnuts
1 cup semisweet chocolate chips
½ cup white chocolate chips
½ cup butterscotch chips
1 (14-ounce) can sweetened condensed milk

1. Adjust an oven rack to the lower-middle position and preheat to 350°F. Spray a 9×13-inch baking pan with non-stick spray. Line the pan with two overlapping pieces of foil or parchment paper, leaving overhang to act as handles for lifting the bars out of the pan. Spray with non-stick spray.

2. Spread the coconut on a baking sheet and bake until the outer flakes just begin to brown, about 4 minutes. (Keep a close eye on it – coconut can go from slightly browned to burnt in a matter of seconds.) Set aside.

3. Melt the butter and combine with graham cracker crumbs in a small bowl. Toss with your fingers until the butter is evenly distributed. Press the crumbs evenly onto the bottom of the prepared pan.

4. In order, sprinkle the walnuts, chocolate chips, white chocolate chips, butterscotch chips, and coconut over the graham crumbs. Pour the condensed milk evenly over the entire dish.

5. Bake until the top is golden brown, about 25 minutes. Cool in the pan on a wire rack to room temperature, about 2 hours.

6. Remove the bars from the pan using the foil or parchment handles and transfer to a cutting board. Using a sharp knife or bench cutter, cut into 2 by 3-inch bars.


Football Snacks

Saturday, February 5, 2011

Okay so I'm a Pittsburgh girl. And for those of you under a rock, this weekend the Steelers go to the Super Bowl. Again. Revin' for Seven! For the playoff game two weeks ago, we had a mini party at home and I provided a dip while my mom made her famous cheesy nachos platter. Oh how I love it.


This dip is good. I wasn't a huge fan of it myself, and I think it was the pepper jack cheese that I didn't like. But, my mom absolutely loved it and so did my dad. So I think if you're a fan of pepper jack cheese then you'll be fine.


For the game tomorrow, I'm hoping to make a dip of sorts again. But, I was asked to make a dessert. I know of some tasty dessert dips, but I was hoping to go cheesy again. I guess we'll see what I come up with!

GO STEELERS!


Cheesy Roasted Red Pepper Dip

from Our Best Bites

7oz jar roasted red peppers (about 1C diced)
4 C grated pepper jack cheese (3/4 lb)
8oz cream cheese
3/4 C mayonnaise
2 T minced onion
3 cloves garlic, minced
1 T Dijon mustard

Preheat oven to 350. Remove peppers from jar and blot excess water with paper towels. You want to make sure they are dry so they don't add moisture to the dip. Then dice 'em up. In a bowl, soften cream cheese in microwave so it will be easier to stir. Add in mayo, onion, garlic, and dijon. Stir to combine and then add in grated cheese and the diced peppers.

Place in an 8x8-ish dish (pie plate works). At this point you can pop it in the fridge if you're going to cook it later and you can even make it a couple of days ahead of time. Place in the oven and cook for 30-45 minutes. Baking time depends on the dish. It will start to bubble and brown on the outside edge, and you want it to be bubbly all the way through to the center. It will be nice and golden brown on top, especially around the edges.

Served with pita or tortilla chips, crackers, baguette slices, whatever.

Cheesy Nachos Platter
from: My Mom

(Most of these ingredients don't need measurements. It's something you adjust to your needs.)
Ingredients:
round tortilla chips
can of cream of cheese soup
1/2 c mild salsa
red pepper, diced
green pepper, diced
onions, diced
tomato, diced
black olives
ground beef
taco seasoning

Directions:
Cook ground beef and add taco mix as per directions. Lay chips on a plate fairly evenly. Heat up cream of cheese soup and pour in salsa. Heat through and pour evenly over spread out chips. Sprinkle ground beef over top. Sprinkle peppers, onions, and olives over top. Enjoy!

This will make enough for a couple plate fulls. So don't put everything all on the first plate! Space it out.

Lemon Ginger Scones

Thursday, February 3, 2011
This was from a week ago. I meant to post it then, I really did.I just feel so busy with school and other life things. I'm baking I swear, I just don't have the time to post about it regularly=/ Whenever I come home from school and musical, I'm basically dead. And then I just have time for dinner, school work, check my blogs, and get ready for whatever tomorrow brings. Sigh. Well here's the post:


I was feeling a tad under the weather yesterday and took the day off from school to recuperate. Don't judge.

What I like about finding recipes on blogs is that you can see first hand how a regular person thought the recipe was and how it looks. So when you find a recipe in a random supermarket magazine, it's hard to tell if it will be any good. But, with the na
me Lemon Ginger Scones, it was hard not to at least give it a try. I had some about to go bad ginger root on hand (I assume ginger root goes bad) so I knew this recipe was meant to be made.


From this recipe, I learned how to mice ginger, I added ingredients incorrectly then had to reach in and pull them out, I had an object fall in my heavy cream mixture and spray everywhere, and I have a surplus of crystallized ginger.


Like most scones, the ingredients are pretty basic except for the special ingredient you use to make your scone unique. I coincidentally had all the ingredients on my sick day and went ahead and made them. I have made my fair share of scones, and a lot of my early attempts were not so good=( After trying so many times I was about to give up. But I kept with it and have definitely gotten better at it. I'd have to say that this batch was the best I have ever made. I didn't over mix so I really think that helped.


These scones came out light and soft, with a melt in your mouth crumb. The ginger and lemon are so soothing. Like a throat lozenge. But not at all! I swear they don't taste like those nasty lozenges! The recipe suggests the usual circle formation and then cut it to make triangles, but I NEVER get even baking when I do that. And drop scones are just as pretty so I did it my way.


Lemon Ginger Scones

from Giant Eagle Market District Magazine, adapted by me

Ingredients:
1 c heavy cream
1/4 c water
2 tbsp lemon juice
3 c flour
1 tbsp baking powder
1/2 tsp salt
3/4 c sugar
2 tsp lemon zest
1/3 c crystallized ginger
6 oz unsalted butter, small chunks
2 tsp vanilla
1 tsp fresh ginger, minced
1 egg beaten
coarse sugar to garnish

Directions:
1) Preheat oven to 375.
2) In a medium bowl, mix together heavy cream, water and lemon juice; set aside.
3) In another bowl, mix together flour, baking powder, salt, sugar, lemon zest and crystallized ginger.
4) Use a pastry cutter to cut butter into the flour until butter is pea-sized.
5) Next, add vanilla, fresh ginger, and egg into the heavy cream mixture and whisk until well combined.
6) Add cream mixture to the flour mixture and mix gently until the dough comes together.
Drop rounds of 1/3 c of dough onto parchment lined baking sheet and chill for 10 minutes.
7)Sprinkle with coarse sugar. Bake in oven for 23 minutes. (Give or take)