Zucchini and Tomato (Crustless) Quiche

Thursday, September 30, 2010

This is such a summer dish. My apologies. I am so ready to head into Fall myself, but I need to clear out some old recipes. Plus, I'm saving up a bunch of the things I've made to hold a Pumpkin Week! That's right. A pumpkin recipe everyday for a week. I know it's not too original (everyone and their mother does it), but I think it's great. I love it when other blogs do it, so now I will too!


In the meantime, you'll have to deal with some end of summer recipes I have left. I am excited for fall baking, though, so I don't feel like writing too much about summer, teehee.


This quiche was all I ever could have hoped for. I, person
ally, prefer crust-less quiches. The crust completely throws off the whole quiche experience for me and I want none of that. Also, I got to use up zucchini, a ton of tomatoes (the love of my life), and a bunch of good cheese. The product was amazing. I am never able to wait for it to be cool, so I did end up burning my mouth a bit. I have a very sensitive mouth.

The juiciness from the tomatoes and zucchini really came through and made the quiche totally fresh tasting. It held up beautifully and was cooked to perfection. This was my first attempt at a quiche and I was not disappointed!


Sometimes I really frustrated myself. I cannot for the life of me find where I got this recipe from. This kills me. I do this way too often, and even after taking the time to try and hunt it down again, I just can't seem to find it. Grrrrrrr! Here are some things I remember being in the recipe, however. This is very lame of me to do, so please don't hold it against me!

Crust-less Zucchini and Tomato Quiche

3 cups zucchini
1 cup chopped tomato
1/2 chopped onion
2 cups shredded cheese
eggs
salt
milk

Ugh. That's all I got=( I'll be back soon hopefully!
Pioneer Woman's Best Coffee Cake. The Real Deal.

Friday, September 24, 2010
My days are still busy as all get out. I won't bore you but basically it's school, volleyball, homework, other sport events, fund raising for my trips, college stuff and other school events. But when I do find a small amount of time, it all goes to baking. It is my stress reliever and I can get my mind off of everything else. It's perfect.


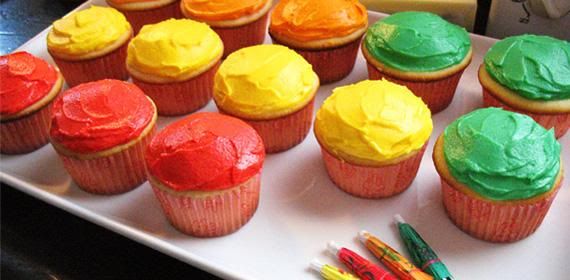
Like this coffeecake. I know, not a great segway, but I'm short on time. I had really low expectations for this. Why? Who even knows. I mean, this is a recipe from the Pioneer Woman herself. How could I ever doubt it???? The ingredients are so simple. You have them all. And yet somehow, when they come together, you find yourself with an unbelievably good coffee cake.


I made a cream cheese glaze to go with it, but in all honesty, you don't need it. This cake is insane. Down right good coffeecake. I only made a half recipe because that's all our house can handle. I say go ahead and make this. GO!


Coffee Cake

from The Pioneer Woman

Ingredients

FOR THE CAKE:

  • 1-½ stick Butter, Softened
  • 2 cups Scant Sugar
  • 3 cups Flour, Sifted
  • 4 teaspoons Baking Powder
  • 1 teaspoon Salt
  • 1-¼ cup Whole Milk
  • 3 whole Egg Whites, Beaten Until Stiff

  • FOR THE TOPPING:
  • 1-½ stick Butter, Softened
  • ¾ cups Flour
  • 1-½ cup Brown Sugar
  • 2 Tablespoons Cinnamon
  • 1-½ cup Pecans, Chopped

Preparation Instructions

Preheat oven to 350 degrees. Sift together flour, baking powder, and salt. Beat egg whites and set aside.

Cream butter and sugar. Add flour mixture and milk alternately until combined. Don’t overbeat. Fold in beaten egg whites with a rubber spatula. Spread in a well-greased 9 x 13 (or LARGER!) baking pan. A cake pan with higher sides would be best.

In a separate bowl, combine topping ingredients with a pastry cutter until crumbly. Sprinkle all over the top.

Bake for 40 to 45 minutes, or until no longer jiggly. Serve warm—delicious!

MSC: Cookies and Cream

Wednesday, September 15, 2010

My schedule is hectic. My homework is out my butt. Volleyball is 24/7. But I had to bake these=)

(This post will be a short one. My apologies!)

I started by making a fourth of the recipe. This wasn't too hard with a recipe calling for four eggs, 16 oz cream cheese, and other numbers easily divisible by 4. The ingredients themselves are few. And since I had Oreo's left over from the ice cream I made, I knew it was fate.


There's a small twist to them though. I did not have cream cheese on hand. GASP. How could I call it fate to make mini cheesecakes whenever I didn't
even have cream cheese on hand?! Because I had just-about-to-go-bad mascarpone cheese on hand. Duhhhh. I guess I was feeling crazy in the kitchen! I also went ahead and left off the tops of the Oreos that I placed on the bottom of each cupcake. I used to tops as the crushed up Oreo for the cheesecake part. A wise choice, I might add.


Okay verdict time: The mascarpone cheese was a definite hit! There was a slight difference in taste but not a bad one at all! It was tough waiting for these to cool. So I had to eat one warm. Not too bad actually=)


Photographing cheesecakes is odd. I'm terrible at photographing food as is, so this was a tricky one. Maybe one of these days I'll learn a thing or two about taking pictures of my food. Until then, trust in my mediocre pictures and know that these beauties were extremely delicious. So delicious, in fact, that eating five of the 6 in one day is in no way a bad thing;)


Oreo Cookies and Cream Ice Cream

Sunday, September 5, 2010
With my recent motivation to figure what kind of food allergies I have, I've been trying to avoid certain foods. As of late, it has been wheat. Avoiding wheat takes a lot out of your diet. So this has lead me to compensate in other areas. Namely ice cream. Dairy Queen blizzards to be specific. After having a week's worth of blizzards, my wallets running low, (and surprisingly I never get tired of having them!) But, being the baker I am, I began to guilt myself as I knew I could be making these at home.


My favorite blizzard has to be the regular Oreo. They also have an Oreo cookie jar flavor, which is Oreo bits AND cookie dough bits. So actually that might be
my favorite. Another good one is their caramel turtle pecan. So good. But I wanted to recreate these at home since I'm in love with my ice cream maker. First up: Oreo! Duhhhhh.


I found an eggless vanilla ice cream recipe (I am so lazy) and then added largely chopped Oreos in at the end. Two things: 1) I should have made a custard ba
se (see next paragraph), 2) I should have made some smaller pieces as well instead of quarter pieces. After seeing the large pieces in it, I wanted to start crushing some up for smaller bits, but my dad stopped me. I don't know why I decided to cater to him, but he wanted the pieces big enough so he could pick them out. RUDE.


I always love eating the ice cream while it's churning. I think that's when it tastes best! For this specific ice cream, it gave me an indicator of what my ice cream would taste like. In this case, chilled whipped cream. I joke not. It was a big batch of fluffy slightly chilled whipped cream. It was so bizarre! I realized that by not making a custard base I would be missing out on the traditional taste, but really, this was intense whipped cream. My mom is a whipped cream fanatic and my dad, surprisingly, loved it as well. But I just couldn't get over the fact that it was "whipped" cream and not "ice" cream.


However.... after proper freezing, this ice cream tasted just fine and I demolished it quickly! I made the Oreo pieces pretty big and I'd have to say this was a huge success. I quite liked this and no need to spend money on blizzards every night! And with the left over Oreos I hope to have another treat to share with you guys!

Oreo Cookies and Cream Ice Cream
from here

1 c whole milk
2 c heavy cream
1/2 c sugar
1 1/2 tsp vanilla
Oreos (I think the amount is very subjective)

Whisk together milk and sugar until sugar is dissolved. Pour on heavy cream and vanilla. Add to ice cream maker and churn according to manufacturers directions.

Add in Oreo pieces when the churning is done and enjoy immediately for soft serve, or freeze.

An Update & Zucchini Cupcakes

Saturday, September 4, 2010
School's here. I already told you that, but now it's official.


Volleyball is in full swing. Well It's actually been in full swing since July, but now that I have to deal with school AND volleyball. My free time is limited. When I do have this rare free time, baking just doesn't seem to fit. Practice is right after school and I get home at 6. Then it's shower, food, homework, and what little else I can fit in. It seems like baking may need to take a bit of a back seat.

Weekends you say? We have all day tournaments every Saturday. Which leaves Sunday for homework and errands. I'm going to try to do some baking, but when I can. I don't want to overwhelm myself, or buy ingredients I never get around to using.

Another bit of news. I don't want to go into too much here, but I have a bit of a food allergy. I've been dealing with it for quite a while. And when I say this, I mean it. Food and eating are obviously two loves of mine, but unfortunately they don't love me. Without going into too much (and we still don't know completely what it is that affects me or the extent of it) I cannot digest many foods well. I get a mixture of painful heartburn to unpleasant and more than average "burp-like" responses, as well as a burning throat and upset stomach. There isn't too much rhyme or reason to which foods cause it or which symptoms I'll have, but we do know it's been going on for a long while and isn't stopping.

In an effort to finally do something about this, I'm working to isolate the problem. This is not an easy thing to do. My first attempt: going gluten-free. Many people are gluten-free, whether it's due to disease or diet. It's a tough transition, but there is enough out there that I am able to still have food options. When it's difficult is eating with others. At our senior retreat, pizza was bought for the whole class. Uh-oh. Long story short, my BFF's always have may back and turned what could have been a really painful experience (both digestively and socially), into a hilarious lunch where I sneakily ate some gluten-free food I hid in my purse. I love those girls!

But still, I don't believe avoiding gluten is the solution. There are foods with wheat gluten that I can eat, and I feel fine after doing so. Like the bagel I ate this morning. I had no problem whatsoever. And then there is peanut butter. The love of my life, peanut butter. It basically destroys me whenever I eat it. =(((( I tried organic almond butter (almonds are not legumes like peanuts) and I still felt a little upset afterward. Oh! And I had one measly slice of a cucumber onetime, and it was soooo painful! Whyyyyyyy??? And I always eat Clif bars as a safe food, but then onetime I had one (though it was on I'd never had before) and it hurt me. Weirddddd.

This is a pretty personal problem and maybe I shouldn't be sharing it, by why not? It is something I'm dealing with and I don't want to be ashamed or embarrassed. By typing this out it is really helping me to take a good look at what is happening with me. Though it is clear the causes are still unknown, I'll just take it one day at a time.

What does this mean to you? Nothing. But it does mean that the things I bake will be very selective, or what I bake may "hurt" me, in a sense. A lot of baked goods seem not to effect me well. Then again, some have no effect.

The bottom line: I don't have time to do all the baking I wish I could, though I will still try! However, if I do bake, it may not be in the best interest for me or my body. But.... I could never go cold turkey with my love of bake goods. That's like telling the muffin man he may want to consider a new day job. Not happening. So you'll see me posting, but more infrequently.

I'm still checking your blogs, though, and I'll try my best to comment like usual!


The excess of summery zucchini led me to make an item reminiscent of Fall. I made a small batch, but these were so good. Moist to a tee and the cream cheese frosting is beyond good. If you're not in the mood for them right now, keep these in your back pocket. You will not be disappointed.

If you search for this recipe online, you're not likely to find it. Her online zucchini cupcake recipe is different than the one from her book. The one I am posting is the one from her book.


Zucchini Spice Cupcakes

from Martha Stewart


Ingredients:

Cupcakes:

3 cups all purpose flour

1 teaspoon baking soda

1/2 teaspoon baking powder

1 teaspoon salt

2 teaspoons ground cinnamon

1/2 teaspoon freshly grated nutmeg

1/4 teaspoon ground cloves

1 cup vegetable oil

2 large eggs, room temperature

1 tablespoon pure vanilla extract

3/4 teaspoon grated lemon zest

2 cups packed light brown sugar

3 cups packed grated zucchini

1 cup walnuts (about 3 ounces), toasted and coarsely chopped


Frosting:

1 cup (2 sticks) unsalted butter, room temperature

12 ounces cream cheese, room temperature

1 pound (4 cups) confectioner's sugar, sifted

1/4 teaspoon pure vanilla extract

Directions:

Cake:

Preheat oven to 350 degrees. Line standard muffin tins wit
h paper liners. Whisk together flour, baking soda, baking powder, salt, cinnamon, nutmeg, and cloves. In another bowl, whisk together oil, eggs, vanilla, and zest until well blended; whisk in brown sugar until smooth. Stir in zucchini, then add flour mixture and stir until just combined. Stir in walnuts.

Divide batter evenly among lined cups, filling each three quarters full. Bake, rotating tins halfway through, until a cake tester inserted in centers com
es out clean, about 20 minutes. Transfer tins to wire racks to cool completely before removing cupcakes. Cupcakes can be stored overnight at room temperature or frozen up to 2 months, in airtight containers.

To finish, use an offset spatula to spread cupcakes with frosting. Refrigerate up to 3 days in airtight containers; bring to room temperature before serving.


Frosting:

With an electric mixer on medium-high speed, beat butter and cream cheese until fluffy, 2 to 3 minutes. Reduce speed to low. Add sugar, 1/2 cup at a time, and then vanilla, and mix until smooth and combined, scraping down sides of bowl as needed. If not using immediately, frosting can be refrigerated up to 3 days in an airtight container; before using bring to room temperature, and beat on low speed until smooth again.