-
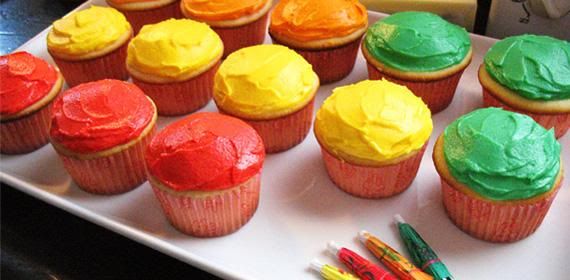
Vanilla Buttermilk Cupcakes
This was a birthday gift for my friends Hawaiian themed party. Little umbrellas were the perfect cake toppers.
-
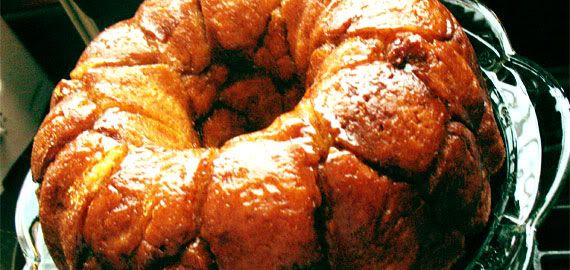
Monkey Bread
So sinfully good.
-
Around the World Cupcakes
My first attempt with fondant.
-
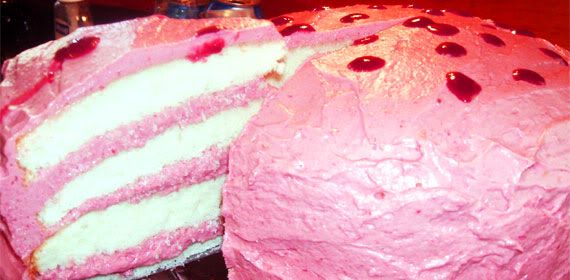
White Velvet Butter Cake
Made over three days, this cake was from the famous book The Cake Bible.
-
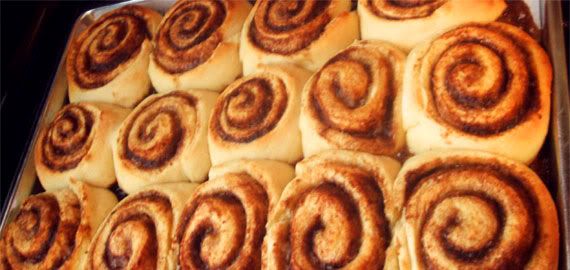
My Mom's Cinnamon Rolls
They beat all other recipes out there. In my opinion...
PW Sweet Potato Casserole
This sweet potato casserole has the perfect balance. A not too sweet sweet potato base and a great nutty brown sugar streusel topping. I love me some streusel. Remember when I used to be streusel crazy? I seem to have moved away from it. Ehh, maybe 2011 well reunite us!
I actually went the homemade route this time and bought actual sweet potatoes instead of canned ones I the had to mash. I felt very authentic. It was really easy, too. I love cooking with sweet potatoes. In fact, I had planned on doing a week of sweet potatoes like I did with pumpkin, but never got around to it. But hey, who says I still can't?!
Bottom line, I got this recipe from the Pioneer Woman, so you know it's good. I tried it and so did my family, and we all loved it. Go for it!
Sweet Potato Casserole
from The Pioneer Woman
Ingredients
4 whole Medium Sweet Potatoes
1 cup Sugar
1 cup Milk
2 whole Eggs
1 teaspoon Vanilla Extract
1 teaspoon Salt
1 cup Brown Sugar
1 cup Pecans
½ cups Flour
¾ sticks Butter
Preparation Instructions
Wash 4 medium sweet potatoes and bake them in a 375-degree oven until fork tender, about 30-35 minutes. When they are finished cooking slice them open and scrape out the flesh into a large bowl.
Add 1 cup of (regular granulated) sugar, 1 cup of milk, 2 eggs, 1 teaspoon of vanilla extract and 1 teaspoon of salt. With a potato masher, mash them up just enough—you don’t want to be perfectly smooth.
Now, in a separate bowl, add 1 cup brown sugar, 1 cup pecans, chopped (that means measure a cup of pecans, then chop them), ½ cup flour, and ¾ stick of butter. With a pastry cutter or fork, mash together until thoroughly combined.
Spread the sweet potato mixture into a regular baking dish and sprinkle the crumb mixture all over the top.
Bake in a 400-degree oven for 30 minutes, or until golden brown.
Cheesy Cauliflower Gratin
This is about a month old, but I think you'll forgive me once you see what it is. Possibly my favorite dish on our Thanksgiving table? Well, besides the homemade gravy made by moi. Okay, our immaculate stuffing is pretty top notch too... but I really did love this dish! I have decided that cauliflower has been so underrated. It's such an amazing vegetable and maybe my favorite one out there. I use to be all about the broccoli, but I think cauliflower is better because it's much softer and doesn't get stuck in your teeth.
I loved making the rue and cheese sauce for this dish. I don't get to do that often, but it was soo fun! The recipe made a ton, which was great. Please please please try this. I know I will be making this again very soon!
Cauliflower Gratin
found Tracey's Culinary Adventures
Ingredients:
1 (3-lb) head of cauliflower, cut into large florets
4 tablespoons (1/2 stick) unsalted butter, divided
3 tablespoons all-purpose flour
2 cups hot milk
1/2 teaspoon freshly ground black pepper
1/4 teaspoon grated nutmeg
3/4 cup grated Gruyere, divided
1/2 cup grated Parmesan
1/4 cup bread crumbs
Preheat oven to 375 F. In a large pot of boiling salted water, cook the cauliflower until tender but still firm, about 5-6 minutes. Drain and set aside.
Add 2 tablespoons of the butter to a medium saucepan set over low heat. Once it melts, add the flour and cook for 2 minutes, stirring constantly with a wooden spoon. Slowly add the hot milk to the pan (to avoid dirtying another pot, I microwaved the milk in a 4-cup measuring cup for 2 minutes). Bring the mixture to a boil, whisking often. Once the milk begins to boil, whisk constantly for about 1 more minute, or until thickened. Remove the pot from the heat and add 1 teaspoon of coarse salt, the pepper, nutmeg, 1/2 cup of the Gruyere, and the Parmesan. Whisk together until you have a smooth sauce.
Pour about 1/3 of the sauce over the bottom of a 9-inch round pie plate (an 8x11 baking dish would work too). Spread the drained cauliflower evenly in the pan then pour the remaining sauce over the top. In a small bowl combine the bread crumbs and the remaining 1/4-cup of Gruyere. Sprinkle the mixture evenly over the top of the gratin. Melt the remaining 2 tablespoons of butter and drizzle them over the gratin. Finally, sprinkle the gratin with salt and pepper. Bake for 25-30 minutes, or until the top is browned.
Monkey Bread
Monkey Bread is a dangerous, dangerous thing. It's right up there with cinnamon rolls and it's just as hard to stop eating once you've gotten started. It is something you can really only make once a year, two times tops. It's evil. Pure evil. Yet, at the same time, it's a beautiful, beautiful thing.
If you have some left over dough (which I did), then this is what you should do. Have a brief talk with yourself and decide that this will be your annual monkey bread allowance. It is truly best to make monkey bread with homemade dough as opposed to store bought. It's so much more satisfying and healthy, but to each his own.
I will admit its not that fast to make. The process of dipping in butter, then the sugar mixture was a tad tiring. But it's all worth it, trust me. And once you put the cream cheese glaze on top, all bets are off. You turn into an animal. You cannot be tamed.
Monkey Bread with Cream Cheese Glaze
found at Butter + Cream
Dough:
4 tablespoons (1/2 stick or 2 ounces) unsalted butter, divided (2 tablespoons softened, 2 tablespoons melted)
1 cup milk, warm (around 110 degrees, but don't sweat having a precise temperature. Just try to make sure it's warm to the touch, but not hot)
1/3 cup water, warm
1/4 cup granulated sugar
1 package or 2 1/4 teaspoons rapid rise, instant or bread machine yeast (I used rapid rise)
3 1/4 cups all-purpose flour, plus extra for work surface
2 teaspoons table salt
Brown Sugar Coating:
1 cup packed light brown sugar
2 teaspoons ground cinnamon
8 tablespoons unsalted butter (1 stick or 4 ounces), mleted
Cream Cheese Glaze:
3 ounces cream cheese, softened
3 tablespoons powdered sugar, plus extra if needed
2 tablespoons milk, plus extra if needed
1/4 teaspoon vanilla extract
Get oven and pan ready: Adjust oven rack to medium-low position and heat oven to 200°F. When oven reaches 200, turn it off. Butter Bundt pan with 2 tablespoons softened butter. Set aside.
Make dough: In large measuring cup, mix together milk, water, melted butter, sugar, and yeast.
To proceed with a stand mixer, mix flour and salt in standing mixer fitted with dough hook.
Turn machine to low and slowly add milk mixture. After dough comes together, increase speed to medium and mix until dough is shiny and smooth, 6 to 7 minutes. (The dough should be sticky but if it is too wet to come together into anything cohesive, add an additional 2 tablespoons flour.) Turn dough onto lightly floured counter and knead briefly to form smooth, round ball.
To proceed by hand, mix flour and salt in large bowl. Make well in flour, then add milk mixture to well. Using wooden spoon, stir until dough becomes shaggy and is difficult to stir. Turn out onto lightly floured work surface and begin to knead, incorporating shaggy scraps back into dough. Knead until dough is smooth and satiny, about 10 minutes. Shape into taut ball and proceed as directed.
Coat large bowl with nonstick cooking spray or a tablespoon of neutral oil. Place dough in bowl and coat surface of dough with more cooking spray or oil. Cover bowl with plastic wrap and place in warm oven until dough doubles in size, 50 to 60 minutes.
Make brown sugar coating: Place melted butter in one bowl. Mix brown sugar and cinnamon in a second one.
Form the bread: Flip dough out onto floured surface and gently pat into an 8-inch square. Using a bench scraper or knife, cut dough into 64 pieces. Separate them from the rest of the “grid” as you cut them into small pieces.
Working one at a time, use a fork to dip each piece in melted butter, allowing excess butter to drip back into bowl. Roll in brown sugar mixture, then layer balls in Bundt pan.
Cover Bundt pan tightly with plastic wrap and place in turned-off oven until dough balls are puffy and have risen 1 to 2 inches from top of pan, 50 to 70 minutes.
Bake bread: Remove pan from oven and heat oven to 350°F. Unwrap pan and bake until top is golden brown, 25-30 minutes. Cool in pan for 5 minutes (no longer, or you’ll have trouble getting it out) then turn out on platter and allow to cool slightly, about 10 minutes.
Make glaze: Beat cream cheese with powdered sugar until smooth and light. Add milk and vanilla, then taste and adjust — you’re looking for something that tastes equally tangy and sweet, and texturally thin enough to drape over the bread but thick enough that it will not just roll off completely.
Drizzle the glaze over warm monkey bread, letting it run over top and sides of bread. Serve warm.
White Chocolate Brownies
These were to die for. So so so good. Obvi I'm not the biggest fan of chocolate. I've said it before and hopefully the shock factor has gone down at this point. But why can't I still find a way to enjoy brownies? When I saw this recipe I bookmarked it immediately and knew I had to try it!
Some comments about the recipe said it needed something throughout so that it wasn't just straight brownie. Another level of interest was needed, basically. Having that in mind, I added dark chocolate chips throughout. In the end, I don't think I needed the dark chocolate chips. As a white chocolate lover (nay, adorer) I could have handled just straight white chocolate brownie. And that's what I'll do next time, because yes, there will be a next time for these. The chocolate drizzle, however, may be more interesting to do instead. I opted out of it this time because I haven't had the easiest times with squeezing chocolate for a drizzle effect. But maybe next time. I loved how she baked it in a round pan as well. So I'd stick with that too.
White Chocolate Chunk Brownie Wedges
from Cookie Madness
Brownies:
4 oz butter (I used regular salted)
4 ounces white chocolate baking bar, chopped (Divided use)
2 large eggs
1/2 cup granulated sugar
1/8 teaspoon salt
1 1/2 teaspoons vanilla
1 1/4 cups all purpose flour (spoon and sweep)
2 oz semi-sweet chocolate, cut into chunks
Glaze:
1 ounce semisweet chocolate
2 teaspoons butter or margarine
Heat oven to 350 degrees. Line a 9 inch round metal cake pan with foil and spray foil with cooking spray.
Melt the butter and half (2 oz) of the white chocolate together in a heat proof bowl set over a saucepan of simmering water. Alternatively, you can melt the butter in the microwave, add the white chocolate to the hot melted butter, stir well then microwave at 30 second intervals until melted. Let cool slightly.
Combine eggs, salt and sugar in a mixing bowl and beat with a hand-held electric mixer for about 3 minutes or until lighter in color and slightly thicker. Add melted white chocolate mixture and vanilla and mix well, then gently stir in the flour. Fold in remaining 2 ounces white chopped chocolate plus the 2 oz of melted semi-sweet. Spread in prepared pan.
Bake for 23-28 minutes (mine took 28) or until toothpick inserted in center comes out clean. Cool 1 hour or until completely cooled.
In a heat proof bowl set over a pan of barely simmering water, melt glaze ingredients until smooth, stirring often. Drizzle over brownies or transfer to a freezer bag, snip off the tip, and squeeze over brownies. Let stand until set. Cut into 18 wedges.
No-Bake Peanut Butter Cups, or Bars
These honestly taste like the real deal. The peanut butter part tastes EXACTLY like the filling of a Reese's peanut better cup. I thought I would be creative and use white chocolate instead of regular, but by then adding some marshmallow fluff to it, I just got a really stiff mixture that was unspreadable. Not cool. So I ended up molding it on like fondant. But worse. It looked pretty bad, but tasted beautiful. It was dead on. I think regular chocolate would have been fabulous too, though I am partial to white. And it would have spread nicer.
So for those of you who love Reese's cups and want to try and make them yourself, look no further! You could make them into cups by using cupcake liners to get the ridges like a real Reese's cup. But I just thought this method was easier and you got the same great taste.
No-Bake Chocolate Peanut Butter Bars
found at The Sweetest Kitchen
Makes 12-16 squares, depending on how you want to cut it
3/4 cups graham cracker crumbs
1 3/4 cups powdered sugar
3/4 cups creamy peanut butter
1 stick unsalted butter, melted
6oz semisweet chocolate, chopped (I used white chocolate)
2 teaspoons Nutella (or peanut butter) (I used marshmallow fluff)
In a large mixing bowl, combine graham cracker crumbs, powdered sugar, peanut butter and butter and beat until combined. Press into a parchment-lined 8×8-inch pan, making sure top is smooth and level.
Melt chocolate and Nutella in a double boiler. Pour chocolate over peanut butter layer and spread out evenly (I tilted the pan around to get a smooth top, instead of spreading it out with a knife). Place pan in refrigerator just until chocolate is set and then cut into bars. Best served at room temperature.
Chocolate Pudding Pie
So obviously I haven't posted in a while. Thanksgiving hit, and it all went downhill. I went to New York with my Honors Chorus at school, and I had an amazing time! Now, I'm back into school and getting back to the way things were. The long break was so very lovely though=) I have been baking, though. It just seems whenever it comes time for me to post about it, I am unmotivated and something else grabs my interest. This must be a sign. I'm frustrated with Blogger sometimes, too, and just need a more relaxed blog style for a bit. That being said, I still want to post recipes and my creations.
However, I want to go back to the basics and blog for myself in more of a recipe book style. I might just post the pictures and recipe and say whether I liked the dish or not. This will just be a simple way of blogging for me since I still want to document my baking adventures. Hopefully this is acceptable and works out for me. By doing this I should be able to blog more often without any pressure. Of course one day I will feel the need to actually blog about things and when that day comes I will certainly return refreshed and better than ever! The post seems highly hypocritical since I am writing quite a lengthy post as it is.
This was called a chocolate "cream" pie, but I would say "pudding". It's crazy that I would make this kind of dessert if you knew me. I am by no means a chocolate fan, and this is a pretty concentrated amount of chocolate! But, balanced out well by a heaping amount of fresh whipped cream, this was quite tasty. My whole family enjoyed it and I have to admit I did too.
Chocolate Pudding Pie
found at The Kitchen Sink
For crust
1 1/3 cups graham cracker crumbs
5 tablespoons unsalted butter, melted 1/4 cup sugar 1/2 teaspoon cinnamon
For filling
2/3 cup sugar
1/4 cup cornstarch
1/2 teaspoon salt
4 large egg yolks
3 cups whole milk
5 oz fine-quality bittersweet chocolate, finely chopped
2 oz unsweetened chocolate, finely chopped
2 tablespoons unsalted butter, softened
1 teaspoon vanilla
For topping
3/4 cup chilled heavy cream
1 tablespoon sugar
1 tablespoon cocoa powder, for dusting
Make crust:
Put oven rack in middle position and preheat oven to 350°F.
Stir together crumbs, butter, sugar and cinnamon and press on bottom and up side of a 9-inch pie plate (1-quart capacity). Bake until crisp, about 15 minutes, and cool on a rack.
Make filling:
Whisk together sugar, cornstarch, salt, and yolks in a 3-quart heavy saucepan until combined well, then add milk in a stream, whisking. Bring to a boil over moderate heat, whisking, then reduce heat and simmer, whisking, 1 minute (filling will be thick).
Force filling through a fine-mesh sieve into a bowl, then whisk in chocolates, butter, and vanilla, stirring until the chocolate and butter is melted. Cover surface of filling with a buttered round of wax paper and cool completely, about 2 hours.
Spoon filling into crust and chill pie, loosely covered, at least 6 hours.
Make topping:
Just before serving, beat cream with sugar in a bowl using an electric mixer until it just holds stiff peaks, then spoon on top of pie.
Place cocoa powder into a fine mesh strainer and sift the powder over the whipped cream. Serve chilled.
Cooks’ note:Pie (without topping) can be chilled up to 1 day.
Take Your Pick
Check out these guys
Popular Posts
-
It's Valentine's Day! And this year I have a very special valentine=) Since Valent ine's Day fell on a school day, we celebrated...
-
So it's no secret that I'm in love with my ice cream maker. I am so thankful for it and can't wait to continue tryin great new f...
-
So obviously I haven't posted in a while. Thanksgiving hit, and it all went downhill. I went to New York with my Honors Chorus at school...
-
Resolutions 1.) Bake more with and for friends and family : This has two parts to it, but they are quite similar. A lot of the baking I did ...
-
With all the left over goodies in my house during the holidays, it just didn't feel right to not give this pie some special attention. S...