White Velvet Butter Cake: Day 1

Thursday, August 27, 2009

I finally did it. I got the cake The Cake Bible by Rose Levy Beranbaum from the library. I know I really should buy it, but I had to test drive it first and see if I'm even capable of making anything in it. I wanted to start at the beginning and make the very first recipe, her perfect pound cake.

But a very good friend, okay my best friend, said she wanted to make a cake with me. It was pretty random. When we got around to meeting up to talk about what kind of cake we'd want to make, she began listing all the cake mixes she had in her cupboard. It took all my strength to stop myself from fainting! I don't really have anything against cake mixes, some are very good, but when she said she wanted to make a cake, well I thought we were going to "make a cake". So I quickly told her that we would be making this thing from scratch and thankfully I was met with no objection.

It took all of five minuets for us to decide which cake we wanted to make. We did the preliminary look through all her pictures, but in the back of my mind I knew exactly what I wanted. Not being a chocolate fan myself, my friend (Maria), was quite willing to comply with this restriction. Of course white chocolate is a completely different story and one I'll save for another time. But by golly I sure love that stuff!

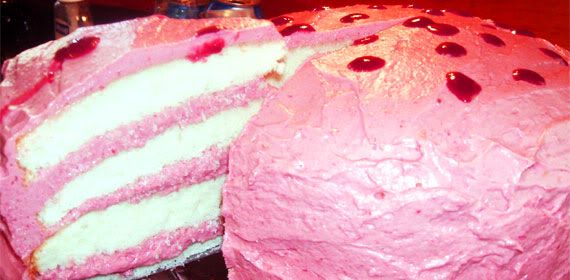
Okay, back to our cake. White velvet. It had a pretty name, it didn't contain chocolate, and we both liked red velvet cake, so why not? She also writes that it is "... the softest and most delicate of all butter cakes." Sounds great to me!

We both had major time restrictions when it came to getting together to bake it. I had volleyball mid-afternoon, she had cavettes (flag twirling) at night. So, we were limited to early morning baking, but of course it's still summer and we don't like to get up earlier than we have to. So this became a three day long ordeal.

Day 1: baking the cakes.

We managed to bake the cake with only minutes to spare until I had to leave. We pulled them out and once the had time to cool, I wrapped them in plastic wrap then foil and put them in the fridge. Unfortunately we wouldn't get back to those for another 3 days.

Ingredients: at room temperature
4 1/2 large egg whites
1 cup milk
2 1/4 teaspoons vanilla
3 cups sifted cake flour
1 1/2 cups sugar (superfine is recommended)
1 tablespoon & 1 teaspoon baking powder
3/4 teaspoon salt
12 tablespoons butter (2 sticks) must be softened

Preheat the oven to 350 degrees. Have 2 nine-inch by 1 1/2-inch cake pans greased, bottoms lined with parchment or wax paper, and then greased again and floured.

In a medium bowl lightly combine the egg whites, 1/4 cup milk and vanilla.

In a large mixing bowl combine the dry ingredients and mix on low speed for 30 seconds to blend. Add the butter and remaining 3/4 cup milk. Mix on low speed until the dry ingredients are moistened. Increase to medium speed (high speed if using a hand mixer) and beat for 1 1/2 minutes to aerate and develop the cake's structure. Scrape down the sides. Gradually add the egg mixture in 3 batches, beating for 20 seconds after each addition to incorporate the ingredients and strengthen the structure. Scrape down the sides.


Scrape the batter into the prepared pans and smooth with the surface of a spatula. The pans will be about 1/2 full. Bake 25 to 35 minutes or until a tester inserted near the center comes out clean and the cake springs back when pressed lightly in the center. The cakes should start to shrink from the sides of the pan only after removal from the oven.


Let the cakes cool in the pans on racks for 10 minutes. Loosen the sides with a small metal spatula and invert onto greased wire racks. To prevent splitting, reinvert so that the tops are up and cool completely before wrapping airtight.

Store: Keep airtight. 2 days room temperature, 5 days refrigerated, 2 months frozen. Texture is most perfectly moist the same day as baking.

Mini Breakfast Streusel Cups

Wednesday, August 26, 2009
So you know what's pretty great to keep on hand? Streusel topping! Yeah, after I made those blueberry crumble bars and only used half the recipe, I had plenty of streusel topping leftover which I promptly put in my freezer. The day before I had old fashioned oatmeal and sprinkled that very same streusel all over it. (Or should I say, I had some streusel-y goodness with a bit of oatmeal thrown into it? Yeah I went a bit overboard.) Well I still wasn't over my streusel obsession this morning either. And this time I wanted to get real creative.

I decided to make little streusel cups in a mini muffin tin with various fillings. Using random items I could find in my fridge, here's what I came up with.
1. Cottage Cheese and Applesauce
2. Oatmeal
3. Peanut Butter and Jelly
4. Cottage Cheese and Applesauce and Cinnamon (this mixture was fabulous!)

Clockwise from top: Streusel bottom, PB&J w/ out topping, cottage cheese & applesauce w/ out topping, and completed cottage cheese and applesauce cup.

So in four mini muffin tin liners, I patted some streusel on the bottom. For the cottage cheese and applesauce, I put that in a separate bowl and stirred them together until creamy then scooped it on the streusel. On one, I sprinkled some cinnamon which I think tasted better than the one without cinnamon. The oatmeal was leftover from the day before, so I just plopped it in. The peanut butter and jelly was tricker. I'm sure there was probably a better way of doing it but I just put a layer of peanut butter over the streusel then a layer of jelly over that. I topped all the cups with more streusel! (Then sprinkle your cinnamon over that if you choose)


Peanut butter and jelly! Cottage cheese, applesauce, and cinnamon! Yummy!

Then bake them at 350 for however long you need to. Mine were done after about 12 minutes. You could tell because the jelly was bubbling. Unlike muffins or cupcakes, you can't just pull the liners off and eat them with your hands. I used a spoon and scooped them out because the were a bit "pudding-like", I guess. The oatmeal one, though, I was able to pull off the wrapper. I guess it depends what you fill it with.

My streusel recipe is just x-amount of butter cut into x-amount of flour and x-amount of sugar. I don't know the exact measurements since I was using leftovers, sorry.

I don't think I've ever used the word streusel as many times as I have in this post but, what can you do? Also, I regret to inform you that the camera I own is a piece of junk (no offense mom!). It was almost impossible to get even one semi-good shot of these cuties. So, just use your imagination or make them yourself to see what they should look like.

Also i think using ramekins would be a great way to make these. I just used mini sized cups because I wasn't sure how they would taste. But if you know what you like then you can feel free to make more substantial sized portions.

So try these out if you're feeling creative one morning with some leftover streusel. If you try any different or crazy fillings, let me know about it!

Pea & Roasted Red Pepper Vinagarette Pasta Toss

Sunday, August 23, 2009
So real quick I wanted to tell you about this salad I tried out. It was from Smitten Kitchen's lovely blog. Usually she never steers me wrong, but I'd have to say I wasn't too wowed by this one.


Without vinaigrette

It was a really basic idea for a pasta salad. I think it would work best as a starting point, but definitely needs things added to it. I guess that sounds pretty harsh, but that's what I thought. It consisted primarily of peas and pasta. Then the vinaigrette is added for some color, flavor, and fluidity between the noodles. I give the vinaigrette two thumbs up! It was slightly frothy with a wonderful "pucker inducing effect" from the added red wine vinegar. I will certainly make this one again and again, experimenting with it on all kinds of things!


So the vinaigrette was great, but the rest was lacking. I served this at a family picnic type thing and it got pretty good reviews. But it was agreeably decided that one could/should build off from it. And I hope to soon. I do think it was saved a little when my mom and I ran to the local corner market and bought some asiago cheese to sprinkle throughout it right before serving. Thank goodness for cheese!! In the original recipe cheese isn't recommended because it was thought to be just fine without it. I thought the cheese was a must!

Also, the ratio of peas to pasta didn't look so good in my bowl. I was really concerned about why my pasta looked so whelming against the peas. I think I figured it out, though. It says to use a small sized pasta whereas I bought medium-sized pasta shells. That's where I think I messed up. But I also think my peas looked really inconsistent in size which didn't look so attractive.

And not to complain anymore but... it was pretty dry tasting to me. Add more dressing if necessary!


To make it was easy enough, I suppose. Boil your two types of peas and then shock 'em in an ice bath. Cook pasta until al dente. Slice one type of pea and then pop peas out of the other type. Combine and stir dressing throughout. But just peas and pasta weren't enough for me. I needed more. So I think I might continue to work with this one, trying out different varieties. It's a great healthy pasta dish idea that I'm hoping to just make my own. So again, no offense to Smitten Kitchen (love your blog!).

Summer Pea and Roasted Red Pepper Pasta
from Smitten Kitchen

1 pound of small pasta (preferably shells because it looks cuter when you find surprise peas inside)
1/4 pound snow pea pods, ends trimmed
1/2 pound fresh summer peas (I don't know if I got the right kind she called for, but I tasted fine)
3/4 to 1 cup Roasted Red Pepper Vinaigrette (recipe below)
cheese added to taste and for visual attractiveness

Bring a large pot of salted water to a boil and prepare a small ice water bath. Boil the snow pea pods for about two minutes, or until just barely cooked but still crisp. Scoop them out with a large slotted spoon and drop them in the ice water bath. Cook the summer peas for about 10 minutes (once again, this will be al dente, you can cook them longer if you prefer them softer), scoop them out with a large slotted spoon and plunge them into the ice water bath as well. Drain both peas. Cut the snow peas into thin slivers.

Add the pasta into the boiling water and cook it according to package instructions. Drain and let cool, then toss in a large bowl with peas and Roasted Red Pepper Vinaigrette, seasoning to taste.

Roasted Red Pepper Vinaigrette

Makes about one cup of dressing

1 red bell pepper, roasted, skinned and seeded or the equivalent from a jar, drained (I used jarred which worked beautifully)
1/4 cup olive oil
2 tablespoons red wine vinegar (add to taste, really)
1 tablespoon chopped shallot (about 1 small)
1/2 teaspoon salt
Several grinds of black pepper

Puree the red bell pepper in a food processor or blender as much as possible, then add the remaining ingredients and running the machine until the dressing is silky smooth. Adjust the vinegar level and seasonings to taste.

My notes:
-smaller shells
-asiago cheese (or your favorite)
-larger peas or more of them
-increase amount of dressing added (make multiple batches because trust me, you'll love it and use it)
-be creative! Add other veggies, different cheeses, herbs, or pasta types.

Pizza Cravings

Sunday, August 16, 2009
So it's Friday night and you're craving pizza. What do you do? Well, normally, you would call on the local pizza place and end up spending way more money than you thought it was when you ordered it. Then, after paying an inflated price, you have an inflated stomach. Neither are really good feelings, yet people just love pizza.

Well it was one of those nights and I was faced with this same dilemma. But, straying from the norm, I decided to make it my self. I mean, hard can it be? I found an easy recipe, with picture and video to boot, and I had all the ingredients at home. Although it seemed slightly time consuming (duh, the dough does have to rise...), I went for it. I had the house to myself (the perfect baking environment) and went to work. Using a basic pizza dough recipe I went through the steps. They were simple and easy to follow, just what I needed for my first time.

Here's a play-by-play of how I did it.


If you're expecting the fluffy, grease ridden kind of crust from most pizza places, then you're not going to like this recipe. This was a thin crispy kind of crust which was surprisingly tasty. Having a thinner crust meant you could have more... You know, that way you're not just eating all this processed and bleached flour, which in ratio to the toppings is almost 2x as much. But my pizza was good. Especially the toppings!!

First up, we had a half "margherita", half spinach and feta. My sister doesn't like a lot or any cheese on her pizza, so I made her a side with just sauce. The spinach and feta side was of course of my choosing,which my mom and dad couldn't complain with.

Spinach & feta pizza topping:
1 t. olive oil
1 sm. onion, chopped
1 t. minced garlic
10 oz. pkg frozen chopped spinach, thawed and squeezed dry
feta cheese, crumbled
*a lot of these measurements were just "eye-balled"

In small skillet, heat oil over medium high heat; add onion and cook 5 minutes. Stir in garlic, spinach; heat through. Spread pizza crust with tomato sauce. Top with spinach mixture. Sprinkle with crumbled feta. Bake 20 - 25 minutes until crust is browned.


I did have a better picture but it was taken side ways and I don't know how to flip it=(. Trust me, this tasted amazing! The spinach and feta was so unbelievably good, and by far the best pizza I've ever eaten in my life. Some of the feta crumbles got brown on top and were gooey goodness when you bit into them! I didn't have the margherita side, that was all reserved for my sister, but she liked it.

The second we had was a half three cheese and half white pizza. For the cheese one I just put shredded mozzarella, some more delicious feta, and some cheddar for color, basically what was in my fridge. For the white pizza, it was garlic and olive oil mixed then spread over the dough. Then chopped tomato, shredded mozzarella and feta were added over it.


(On the left is the white and the three cheese is on the right)
I really liked this picture. I can almost taste it all over again... The white was pretty good, but I'm a huge fan of sauce so it was just "meh." for me. The three cheese was definitely a great classic choice that everyone was pleased with.

I honestly didn't have to cook them very long at all. The first one was in for maybe 20 mins and the second was 15, but it could have been shorter.

Sometime I'd like to make a stuffed crust with cheese in it and maybe some garlic bread sticks, too. That store bought pizza sauce was darn good and would be a grat dipping sauce.

MSC #1: Chocolate Salted-Caramel Cupcakes

Saturday, August 15, 2009

Soo... umm... yeah. I guess I should be completely honest. I didn't make these. I skipped the very first MS cupcake. I know that's really terrible of me, especially with it being the very first online baking club I've joined. But if I'm being honest, I just didn't like the cupcake. I mean no offense to Betty our founder, but it just wasn't up my alley. Chocolate Salted-Caramel Cupcakes. I'm not a huge chocolate fan, especially in cupcake form, but the salted caramel was what sealed the deal even more. Caramel in small amounts or mixed into things properly, I can tolerate. But when salted and dolloped on top (and then added to chocolate), I cringe. I know this is strange, but it's me.

Really my biggest issue was the fact that no one in my house would eat them. My dad loves chocolate but would in no way have tried the salted caramel and my sister was pretty much the same. My mom and I are die hard vanilla fans, and even though we may have tried one or two, I couldn't justify making 56 minis!

I will tell you that I will most definitely participate in next month's bake which are zucchini-spice cupcakes. So I hope no one's too upset with me. In any case, please check out the other bloggers who did participate in this month's bake-along. You can find all the participants on EAT MY CUPCAKE's blog on the right.

Comments

I have just been informed that no one's been able to leave comments recently. Well don't worry, I believe I just fixed the problem. So now you can go comment crazy =). Sorry for the inconvenience.

Blueberry Crumble Bars!!

Tuesday, August 11, 2009

So I confess I've never actually really truly eaten blueberries before. Weird, I know. But when I saw this recipe, I was dying to try it. I was not disappointed.

I changed the recipe slightly by using a 8 x 8 pyrex pan (instead of the 9 x 13 recommended). Because of this, I probably had a thicker bottom than the original recipe called for. I did leave out about 1/4 of the crumble crust before baking because my pan was much smaller. Also, the recipe says to use the zest and juice of a whole lemon, but oddly I only had half a lemon available. We had used up all our lemons the night before with a fish dinner even though I had planned to use those lemons in this recipe for awhile now. It wasn't noticeable at all.


This was really simple to make and it produced amazing results. I mean AMAZING! Just put down your crust, slab on the blueberries, and sprinkle over the topping. Then pop it in the oven and wait. And although it says to eat the bars chilled, I just had to try it warm. Eaten warm, it has a cobbler taste to it. Not bad at all. But chilled, well then the true flavors come out and you're blown away! I did add some whipped cream to mine. It covers the flavors a bit but if you eat them separately, like one then the other, then it's "money".


Blueberry Crumble Bars
from Smitten Kitchen

1 cup white sugar
1 teaspoon baking powder
3 cups all-purpose flour
1 cup cold unsalted butter (2 sticks or 8 ounces)
1 egg
1/4 teaspoon salt
Zest and juice of one lemon
4 cups fresh blueberries
1/2 cup white sugar
4 teaspoons cornstarch

1. Preheat the oven to 375 degrees F. Grease a 9×13 inch pan.

2. In a medium bowl, stir together 1 cup sugar, 3 cups flour, and baking powder. Mix in salt and lemon zest. Use a fork or pastry cutter to blend in the butter and egg. Dough will be crumbly. Pat half of dough into the prepared pan.

3. In another bowl, stir together the sugar, cornstarch and lemon juice. Gently mix in the blueberries. Sprinkle the blueberry mixture evenly over the crust. Crumble remaining dough over the berry layer.

4. Bake in preheated oven for 45 minutes, or until top is slightly brown. (This took an extra 10 to 15 minutes in my oven.) Cool completely before cutting into squares.

Cottage Cheese Pancakes

Monday, August 10, 2009
Wow what a terrible picture. But it's either this or nothing. So yeah I made cottage cheese pancakes for no reason really except that I had some cottage cheese. After looking through dozens of recipes, I basically chose the simplest recipe I could find. This recipe does use yogurt and luckily I had some I was trying to use up. Unfortunately it was french vanilla flavored, which is normally a good thing, except in this case. I really didn't like the 'fake-ish' tasting vanilla flavor the pancakes gave because of that. So I wasn't a big fan of the yogurt. That said, I think it was a pretty good outcome otherwise. My mom ate hers with applesauce on them and she said it was mighty tasty. I just used butter(which tasted weird against the vanilla for some reason), syrup, and eventually added some powered sugar to my last one.

Although the recipe called for small-curd, I used large. I had no real problems or anything. In fact, while you're eating them you'll find a random curd and it's like a soft little cheese pocket. Good stuff.


Cottage Cheese Pancakes

Makes about 16 pancakes

1 cup yogurt or sour cream
1 cup small-curd cottage cheese
4 eggs
1 cup flour
2 tablespoons sugar

Mix together yogurt, cottage cheese and eggs until well combined. Fold in flour and sugar until no flour streaks remain. Batter will be thick.

Butter a pancake griddle and heat to medium. Use a ladle or a large spoon to form pancakes. When bubbles form and start to pop on the top, flip the pancakes and cook for another minute or two.


Simple, easy, buttery jam cookies

Friday, August 7, 2009
So I've been dying to bake something lately. I mean, I was like suffering from withdrawals by not baking something for over a week (or two)! And although I rented the Martha Stewart Cupcake book from the library, it had yet to come in and I desperately needed to fulfill my baking needs. So I made these babies.


They were extremely simple and easy to make. It involved pretty basic ingredients, as long as you had some jam. To me, they tasted a lot like scones. And although the recipe says you can get 50 cookies out of this batch, I was somewhere around 20, of course I did make 6 jumbo ones. But still, from other bloggers who made these cookies, they only yielded around 25. I guess you're supposed to make them pretty small. If you do, they have a really nice scraggly texture that is just divine. But for the 6 jumbos I made, they had a more scone like taste, which is nothing to complain about.


The jam really came through in my cookies, which was nice since I was worried it wouldn't. I definitely thought these were might
y tasty. And they act as pretty good breakfast cookies on account of the butter and jam.


Buttery Jam Cookies


Adapted from Baking: From My Home to Yours by Dorie Greenspan.

2 cups all-purpose flour
1 tsp. baking powder
1/4 tsp. ground ginger
1/4 tsp. ground cinnamon
1/4 tsp. salt
8 tbsp. (1 stick) unsalted butter, at room temperature
2/3 cup sugar
1 large egg
2 tbsp. whole milk
1 tsp. vanilla extract
1/3 cup strawberry jam Or whatever kind of jam you feel like using!
powdered sugar for dusting

Preheat the oven to 375 degrees. Line a cookie sheet with parchment paper and set aside.

Sift together the flour, baking powder, ginger, cinnamon and salt. Set aside.

In the bowl of an electric mixer, with the paddle attachment, beat the butter and sugar (on high speed) for 2 to 3 minutes until light and fluffy. Add the egg and beat on high speed for an additional minute. Add the milk and the vanilla extract and beat on high speed for 30 seconds. Add the jam and beat on low speed for 1 minute. Add the dry ingredients, with the mixer on low speed, just until they’re mixed in. The dough will be extremely thick and stiff. I don't have an electric mixer, so all this was done with a hand mixer and it worked out just fine.

With a an ice cream scoop or a teaspoon, drop spoonfuls of the dough onto baking sheets, forming cookies that are about 1 inch to 1-1/2 inches in size. The dough is pretty tasty...
Bake the cookies for 10 minutes.(for my jumbo ones, it took about 22 mins, and they could have gone longer if I wanted them too. My small ones though took around 18ish, but my oven is pretty whack to begin with so proceed with caution using my times.)

Once baked, let the cookies sit on the pan for a minute or two and then remove to a wire rack and let cool completely. Dust with powdered sugar before serving. I recommend doing this. It certainly enhanced the flavor.

Note: This recipe will yield between 40 and 50 cookies, depending on size. So not true...

A bit of catching up

Thursday, August 6, 2009
So I have a bit of old business to attend to. First off, a long long time ago (like three weeks), I made these delicious drumsticks! My cooked marinade sauce didn't get thick at all, but it was extremely wonderful! They tasted barbeque-y, I loved the darker spots=), and a bit asian-y with the addition of sesame seeds. We had brown rice with it and I pretty much soaked mine with the cooked marinade sauce. Over all, 3 thumbs up.

Sweet & Sticky Chicken Drumsticks
from Tracey's Culinary Adventures

1/2 cup balsamic vinegar
1/2 cup honey
1/2 cup light brown sugar, packed
1/4 cup soy sauce
5 fresh rosemary sprigs
5 garlic cloves, halved
10 to 12 chicken drumsticks
2 tablespoons toasted sesame seeds
1/4 cup chopped fresh flat-leaf parsley leaves

Combine the vinegar, honey, brown sugar, soy sauce, rosemary sprigs and garlic cloves in a large, resealable plastic bag. Shake and squeeze the contents of the bag to dissolve the honey and the brown sugar. Add the chicken to the bag and seal, squeezing out as much air from them as possible. Marinate in the refrigerator for 2 hours.

Preheat oven to 450 F. Line a rimmed baking sheet with aluminum foil.

Remove the chicken drumsticks from the bag, reserving the marinade, and arrange them on the prepared baking sheet. Bake until the skin is caramelized and very dark in spots, 30 to 35 minutes.

Meanwhile place the marinade in a small saucepan. Bring the marinade to a boil, then reduce the heat to a simmer and cook over low heat until thick, about 15 minutes.

Use a pastry brush to brush some of the cooked marinade on the cooked chicken. Sprinkle the chicken with the sesame seeds and chopped parsley before serving.

Then there was the lemon cream pie. I made this while staying at my grandma's house. That said, I couldn't make anything too sophisticated with my left over lemon curd, (like a slew of lemon cookie type recipes I was looking at). She had limited ingredients and I didn't want to make her pay for a bunch of expensive items I'd need. So I settled on a harmless and easy to make lemon cream pie. I did need to buy a pie crust, and yes it was just your store bought graham cracker crust. Like I said earlier, I didn't have much to work with. Then all else I had to buy was some whipping cream.

I didn't use a recipe really, just the rest of my lemon curd (1 1/2-2 cups left maybe??), which into I folded 1 cup of whipping cream (which I beat until stiff enough), and a store bought pie crust to put it in. No fancy topping and I wouldn't put whipped cream on it since it's already in it. Then I just let it chill over night. Simple.


Try, try, try again: Lemon Roulade

Wednesday, August 5, 2009
So my initial attempt at a lemon roulade didn't go so well. But when I'm down in the dumps about a baking disaster, my mom is always there to pick me up and get me back into action. So I went and found a new recipe. I was actually never a fan of meringue, but I was trying to keep to the original idea of the lemon and the meringue working together. What I decided to now do is find a more cake like recipe for it. This suited me much better. I also decided to stay with the original filling I found because it used the lemon curd I worked so hard to make.

And guess what? The cake turned out amazing! I had absolutely no issues what so ever. It was perfectly and evenly cooked through. I went out and bought parchment paper for it, which may have helped.


Also, I just want to mention how delicious the whole thing put together tasted. The cake was a nice light outer "shell", for lack of a better word, that securely held in the fluffy, creamy, slightly tart lemon filling. It's the perfect light after dinner treat that won't make you feel like you've over stuffed yourself.

Here's the lovely cake recipe I found:

4 large eggs, separated
1/4 cup sugar
1/4 cup all-purpose flour
1/4 cup cornstarch
1/2 teaspoon vanilla
1/2 teaspoon finely grated fresh lemon zest
1/3 cup confectioners sugar for dusting

Preheat oven to 400°F.
Butter a jelly-roll pan, then line bottom with a large sheet of parchment paper, letting paper hang over ends by 2 inches, and butter paper.

Beat egg whites in a large bowl with an electric mixer until frothy. Add granulated sugar, 1 tablespoon at a time, beating constantly, and beat until whites just hold stiff peaks. Beat yolks in another large bowl with cleaned beaters until slightly thickened and pale, about 5 minutes with a standing mixer or 7 with a handheld. Fold one fourth of whites into yolks to lighten. Pour yolk mixture over remaining whites, then sift flour and cornstarch on top and fold in gently but thoroughly. Fold in vanilla and zest.

Spread batter evenly in baking pan and bake in middle of oven until cake is puffed and springy to the touch and top is lightly browned, about 10 minutes. Loosen paper from sides of pan. Sprinkle cake with 1/3 cup confectioners sugar, then cover with another sheet of wax paper and a baking sheet. Invert cake onto sheet and remove baking pan. Cool cake completely and peel paper from top.

So while waiting for this to cool, I made the filling.

1/2 cup lemon curd
4-oz cream cheese, room temperature

1 cup whipping cream

Cream together lemon curd and cream cheese until mixture is smooth. Beat whipping cream to soft peaks in a small bowl, then fold into the cream cheese and lemon curd mixture.


Okay. Then once it cooled, I spread the filling out evenly over it. I ended up using all of the filling just because I loved it so much, although you probably could use less if you prefer. Also, I really only left like a half an inch border untouched by filling, unlike most recipes that tell you to leave almost 2 inches. Personally, I think that's a waste of space.


I get really nervous when it comes to critical points in recipes where it's make it or break it time, so I let my mom roll it up in case I were to totally screw it up. Yeah, that's how much self-confidence I have.


And this is what it looked like all rolled up. I put it straight in the fridge to chill it. This will keep it cleaner when you cut into it and go to eat it. Plus, I think it tastes well, tastier this way. But room temp. is okay. Just don't try heating it, that could be a disaster. And I highly recommend sprinkling powdered sugar all over this baby, because it just adds a contrast of sweetness against the tart lemon flavor.

Protein packed crepes make a healthy and yummy breakfast

Tuesday, August 4, 2009
Okay, so no pictures with this post but I just had to tell you about my breakfast=).

It was a real spur of the moment kind of thing. I got home from my super early volleyball practice and needed food! But, I bought this expensive protein powder stuff to have after those draining practices. I bought the vanilla flavor since I'm not the biggest chocolate fan (GASP!), but it kinda tastes like crap. So I've been trying to think of ways to use it in recipes because drinking it is repulsive.

Well this morning a random idea came to me. Crepes! So I looked up your basic crepe batter and then downed the recipe to only about 2-3 servings. So I ended up with something like this:
1/3 cup of flour
1/4 pinch of salt
1/16 cup of sugar
1/4 of an egg
1/3 cup milk
1/2 tablespoon melted butter

So instead of flour I used the recommended serving size of the protein powder. It wasn't enough for the 1/3 of a cup, so I used flour for the rest. And yes, it is kind of weird to only use a 1/4 of an egg or a 1/16 cup of sugar, but whatever.
First combine your flour, salt, and sugar, and make a well in the middle. Then add the egg and milk and whisk until smooth. Finally, whisk in butter slowly.

After that I pretty much just heated my small skillet and poured in a third of the batter, depending on how big you want them. I spread it out as thin as possible and waited for it to cook. It became a pretty pale color, not your usual yellowish pancake-ish color. I actually had no trouble at all with cooking them or flipping them. It yielded 3 delicious crepes for me.

With the crepe on my plate, I spread a small amount of grape jelly on one end, then rolled it up. Then, I heavily dusted it with powdered sugar=).

They tasted really good. I think my mom makes delicious ones, and I think they have more of a pancake flavor without the protein powder, but with the jelly and powdered sugar they taste just fine.

So if you have some kind of protein powder or other powdered supplement that you're looking to experiment with, go for it. And I most definitely recommend trying crepes, with or without substitute powder. They may seem intimidating to make (or at least I thought they did...) but they're actually super simple, and if you maybe don't flip them perfectly they're still going to taste great!

Also I may post some other recipes I've tried to substitute protein powder in and let you know how those go.